

If you want to get involved with Nillion's innovative decentralized technology and possibly earn rewards along the way, this guide is for you! By becoming a verifier on Nillion, you contribute to the network's security and integrity and open up the potential to qualify for the Nillion token airdrop.
This tutorial will walk you through the steps to become a verifier, explore what’s required, and explain how it might unlock exciting opportunities in Nillion’s ecosystem. Let’s dive in and get you started!
Buy a VPS
Complete “Secrets”
Be a Verifier
Buy a VPS:
Go to: https://pq.hosting
Register for an account on PQ Hosting. If you already have one, just sign in.
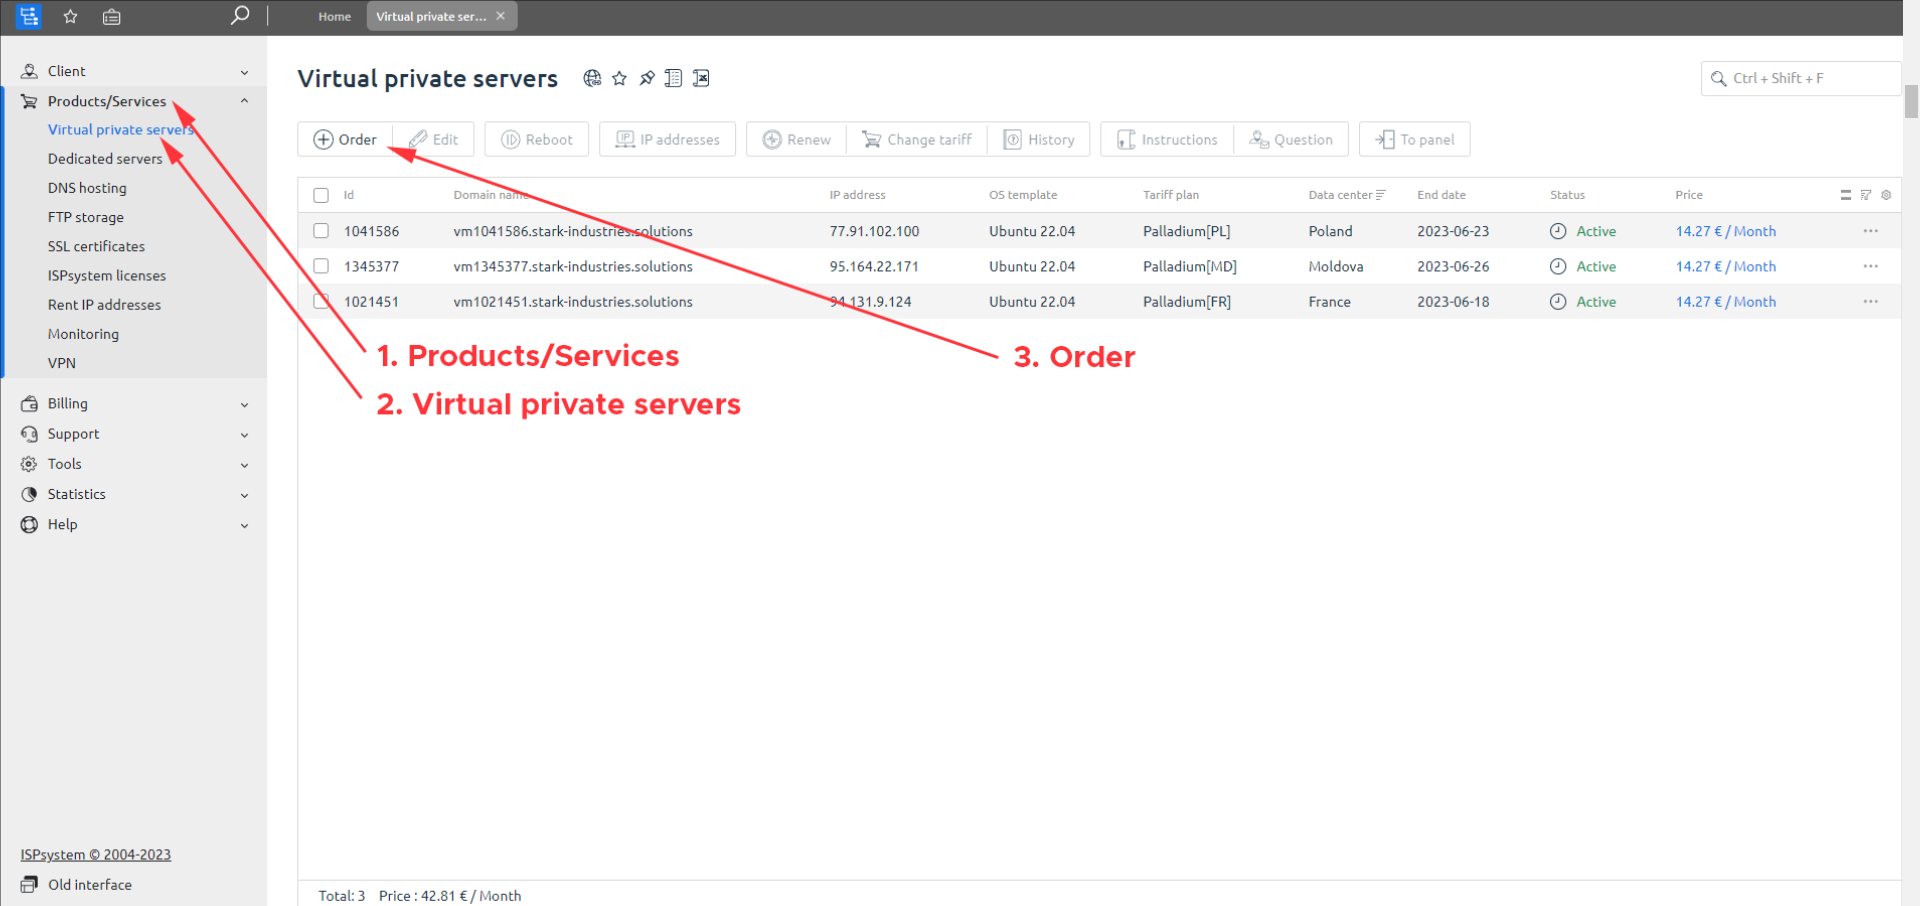
Next, navigate to “Products/Services” and select “Virtual Private Servers”.
Now, click on “Order” 👇🏻
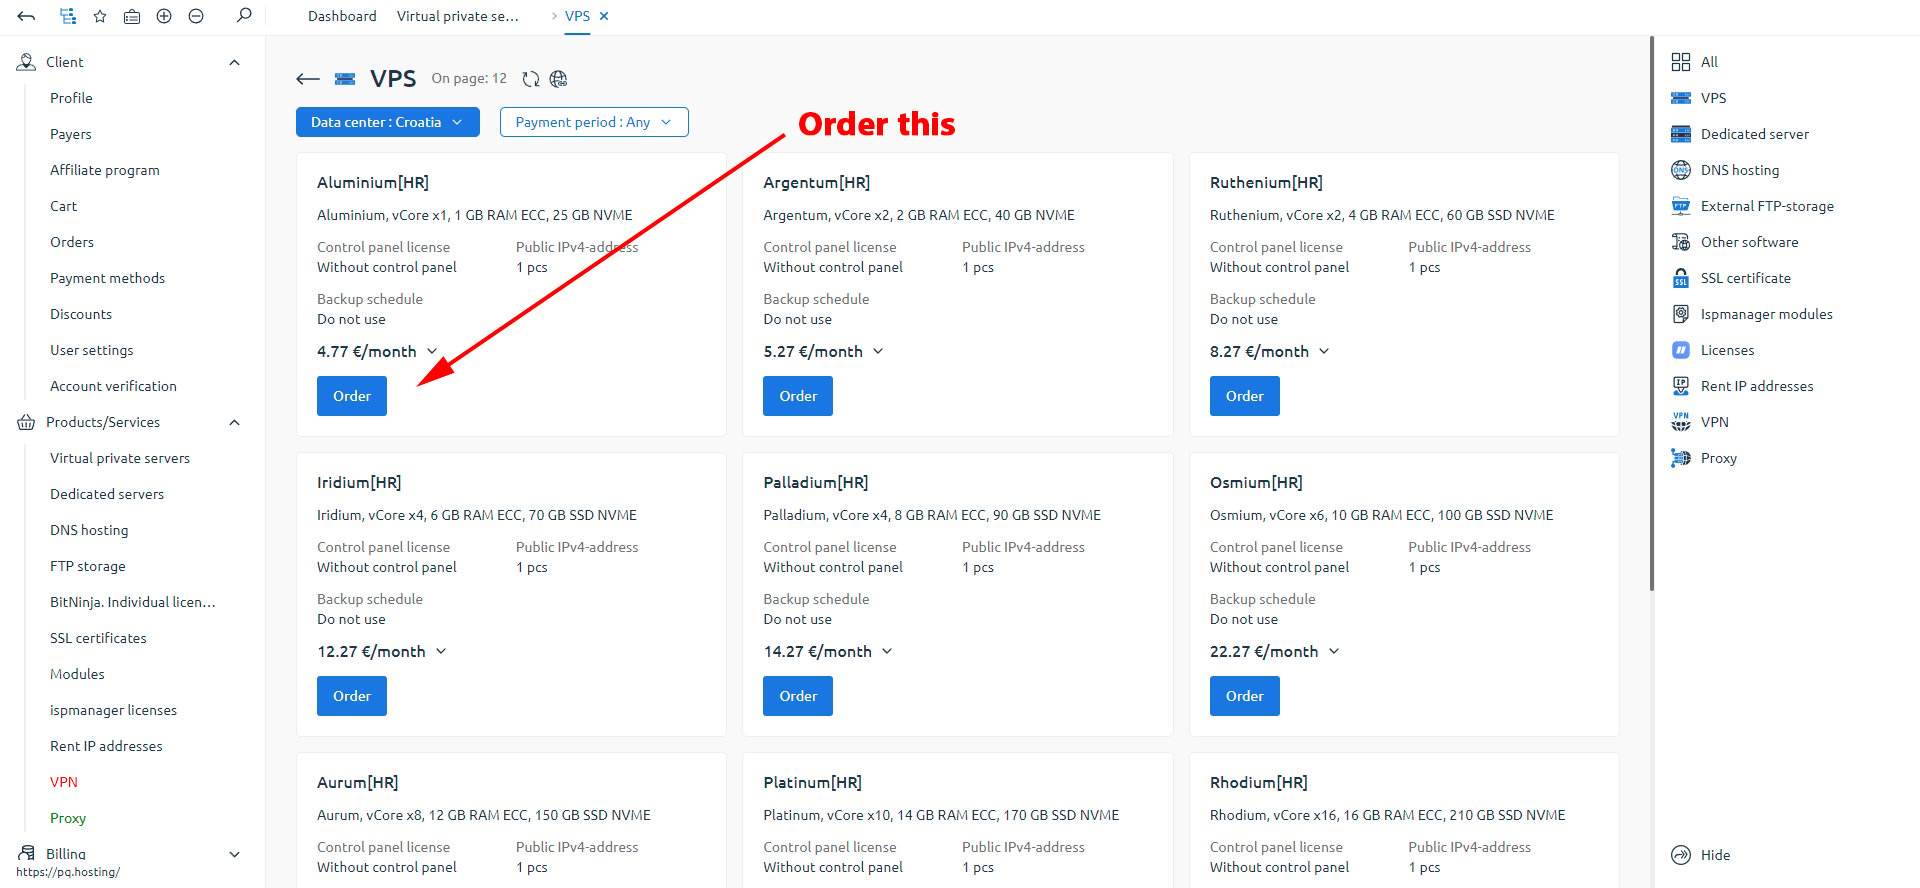
Order the cheapest VPS 👇🏻
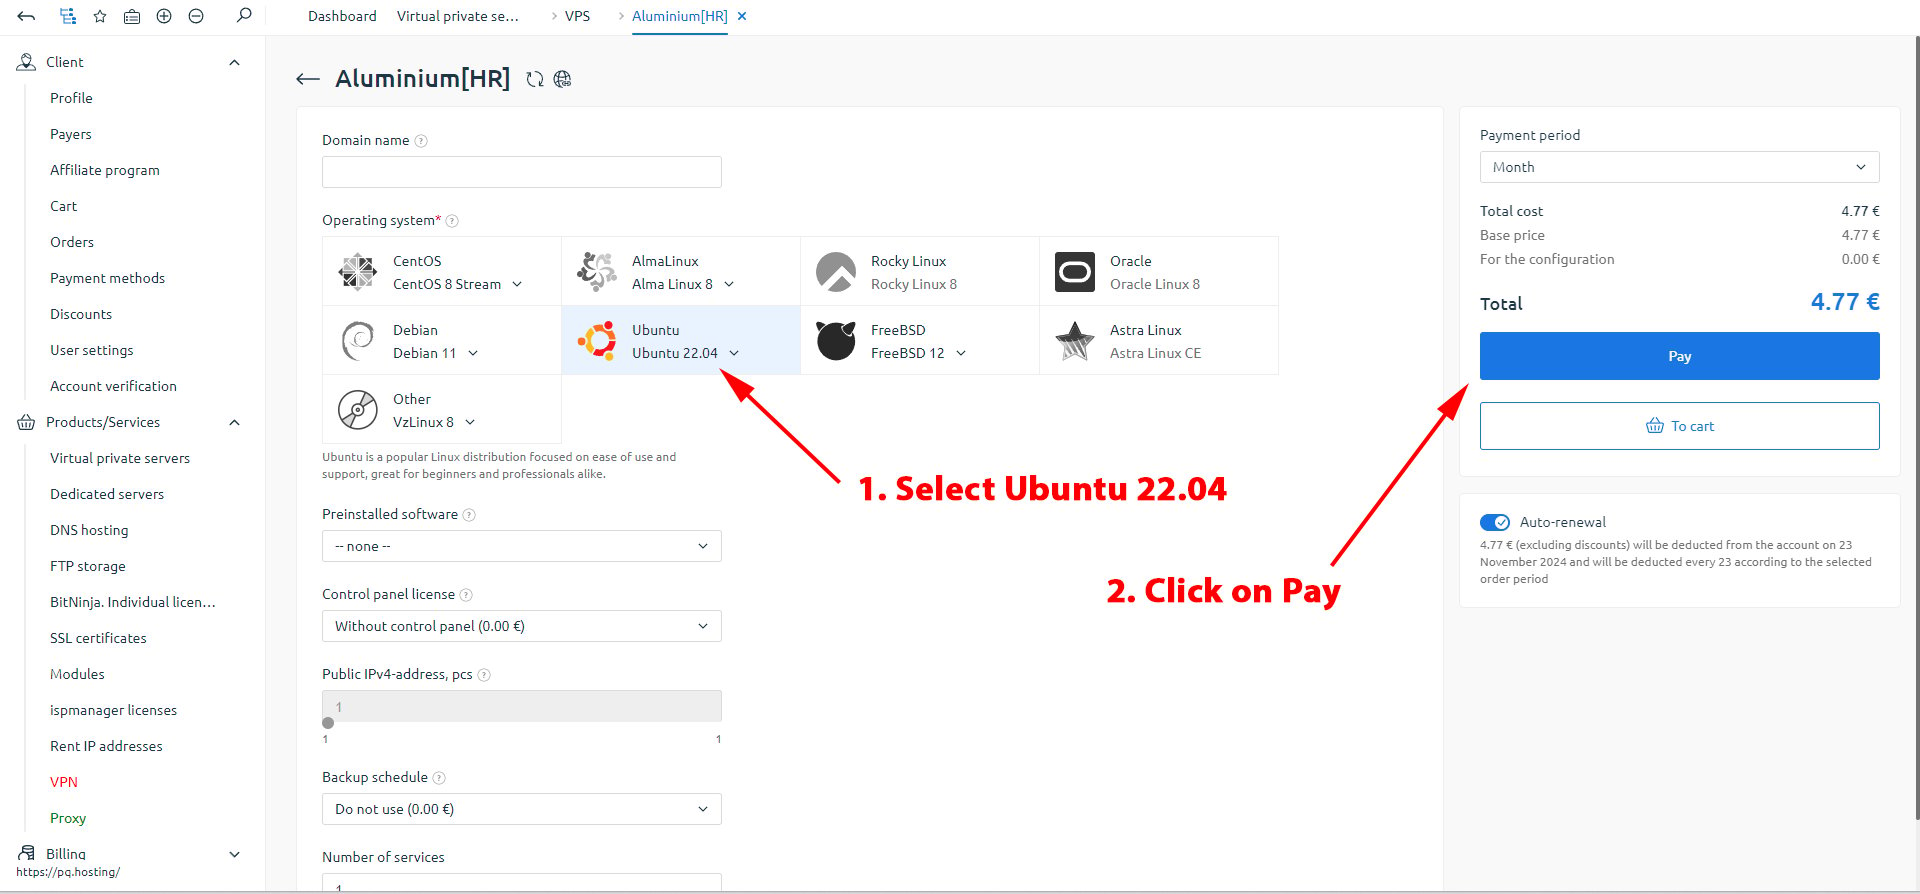
Select “Ubuntu 22.04” as the operating system and click on “Pay”.
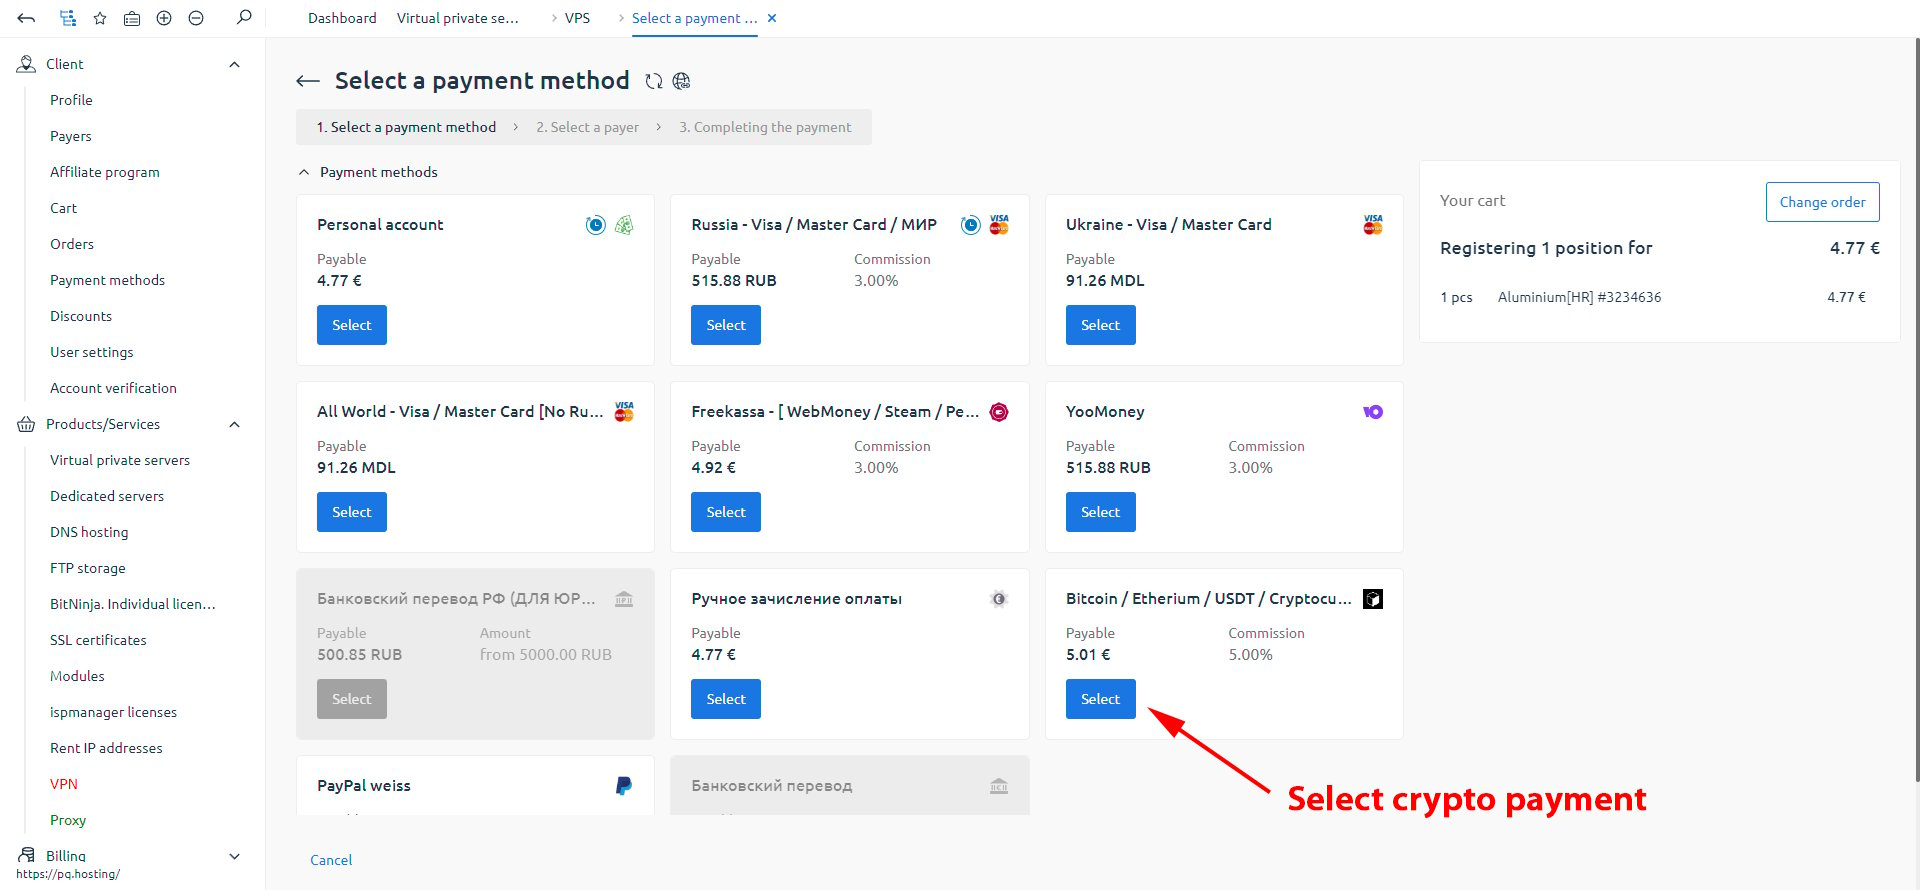
Select cryptocurrency as your payment method and complete the transaction.
Once the transaction is complete, navigate to the 'Virtual Private Servers' page.
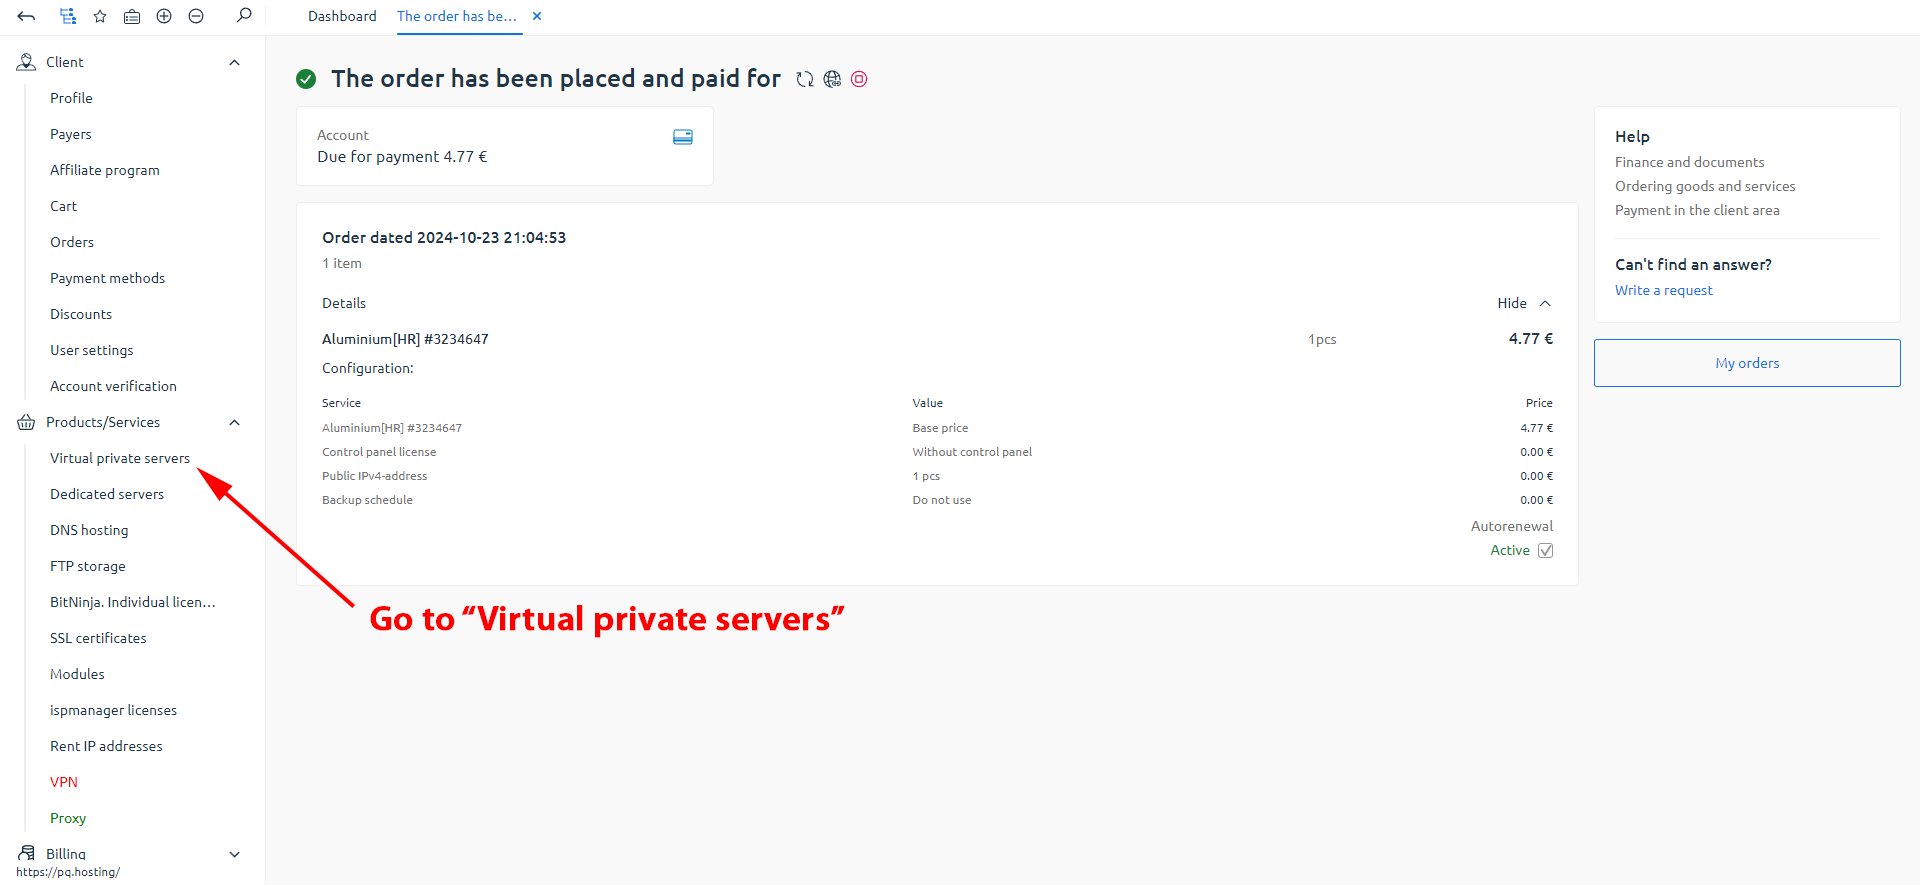
There, you'll first see either 'Ordered' or 'Activating'.
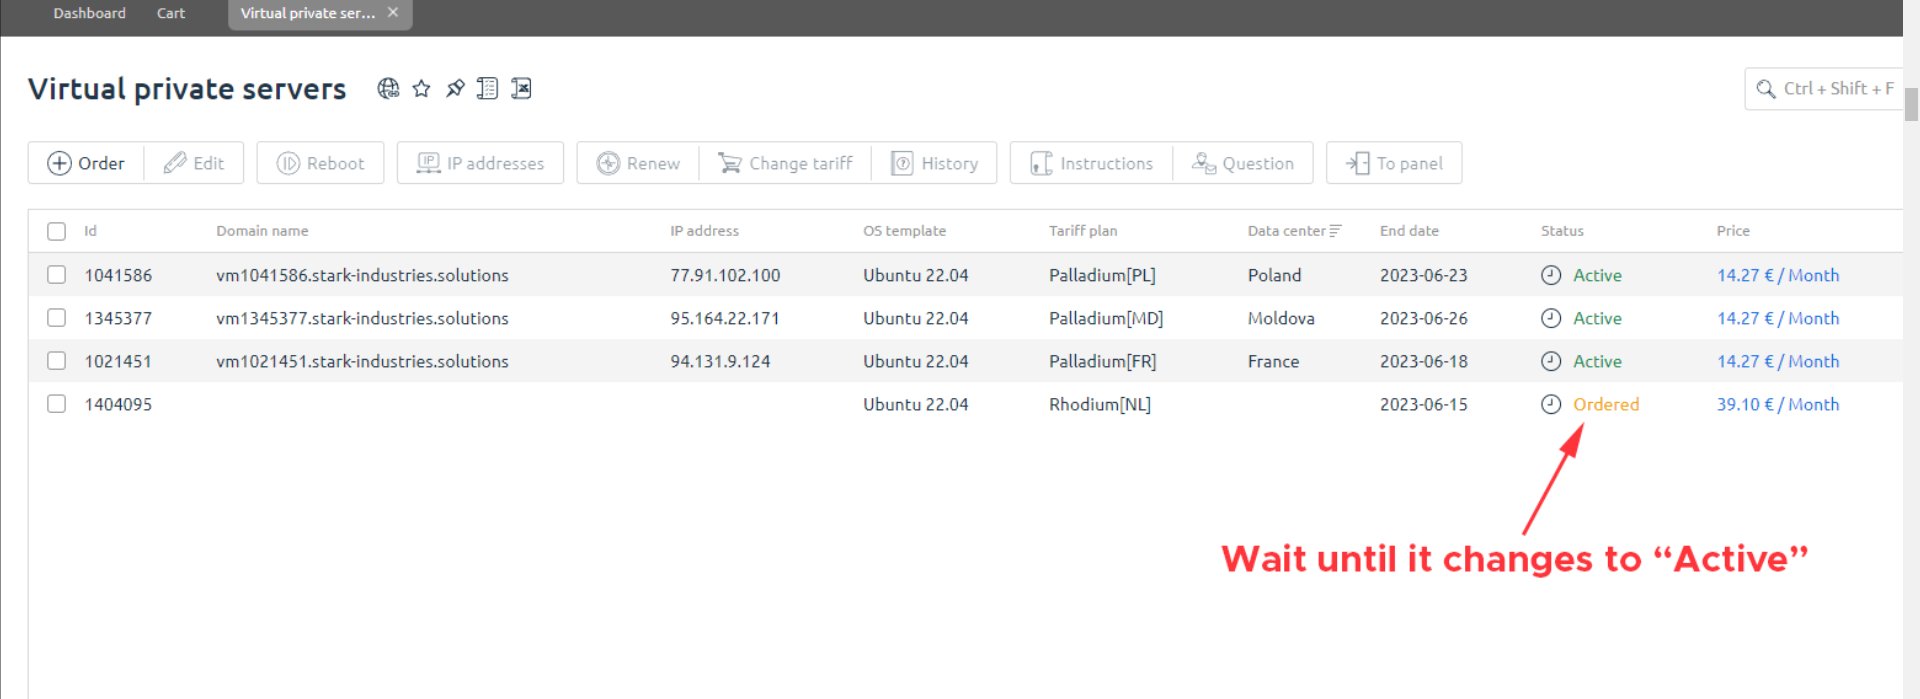
After a few minutes, the status will update to 'Active'.
If more than an hour passes and the status hasn’t changed to 'Active', reach out to support for assistance.
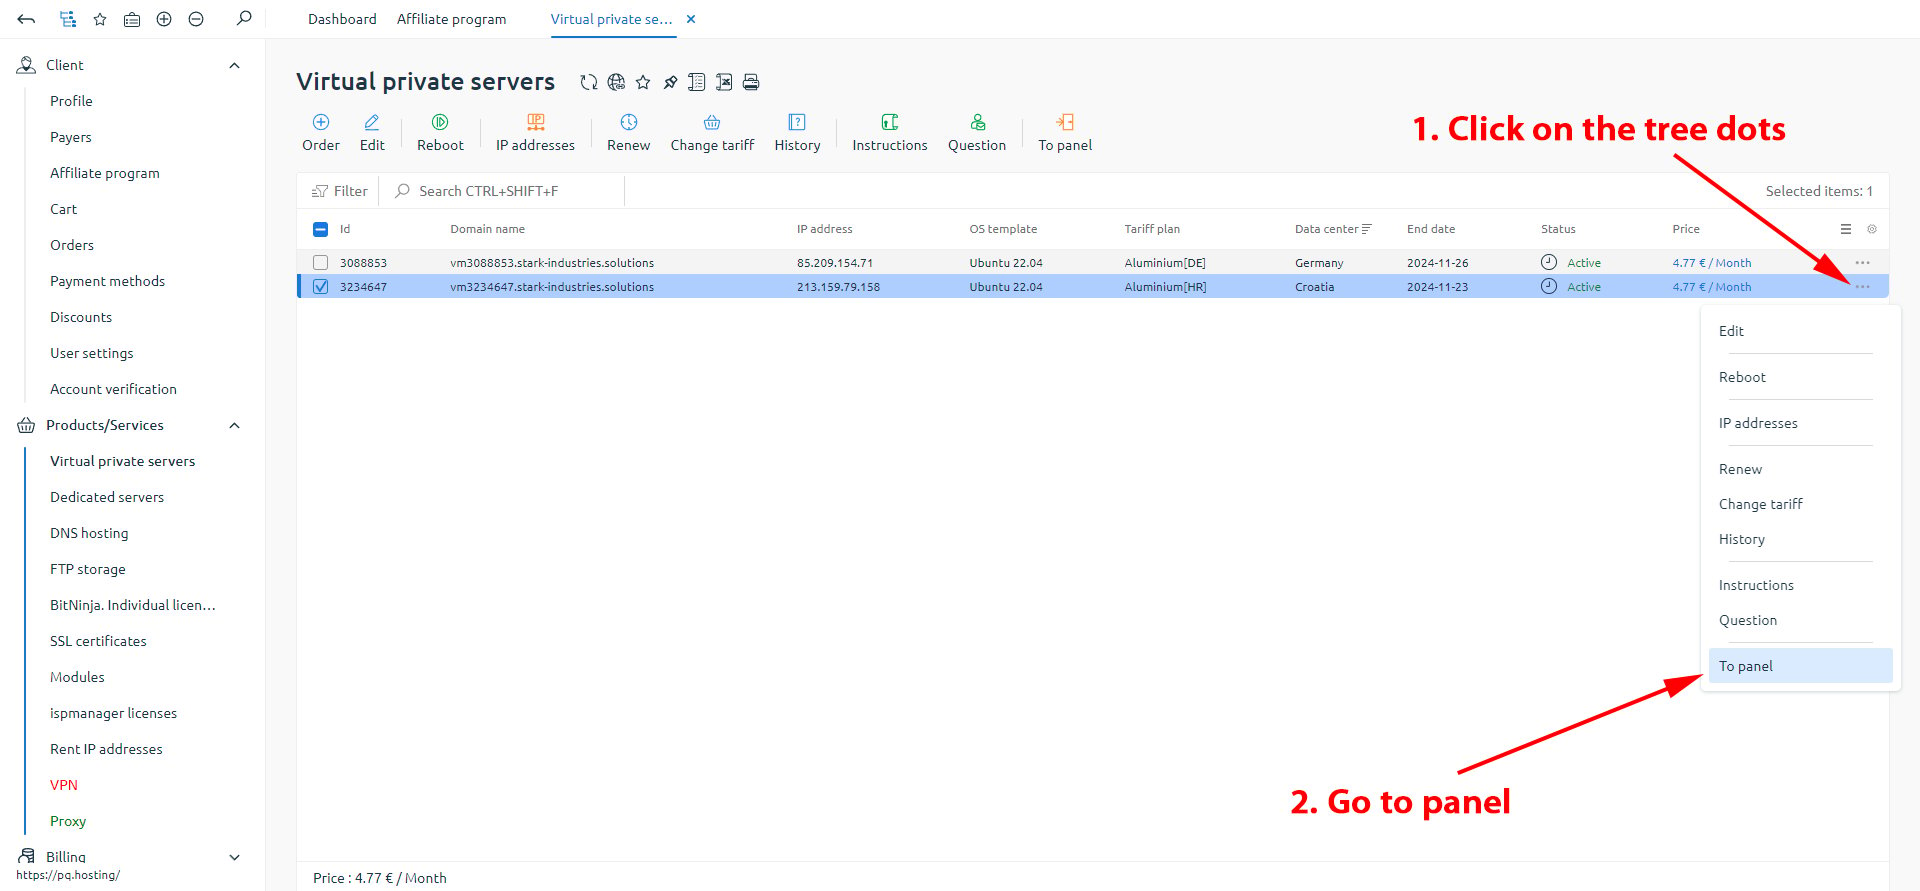
After activation, click the three dots next to the server you purchased, then select 'To panel'.
On the new page, click the three dots and set a new password by selecting 'Change password'. Remember to save your password securely.
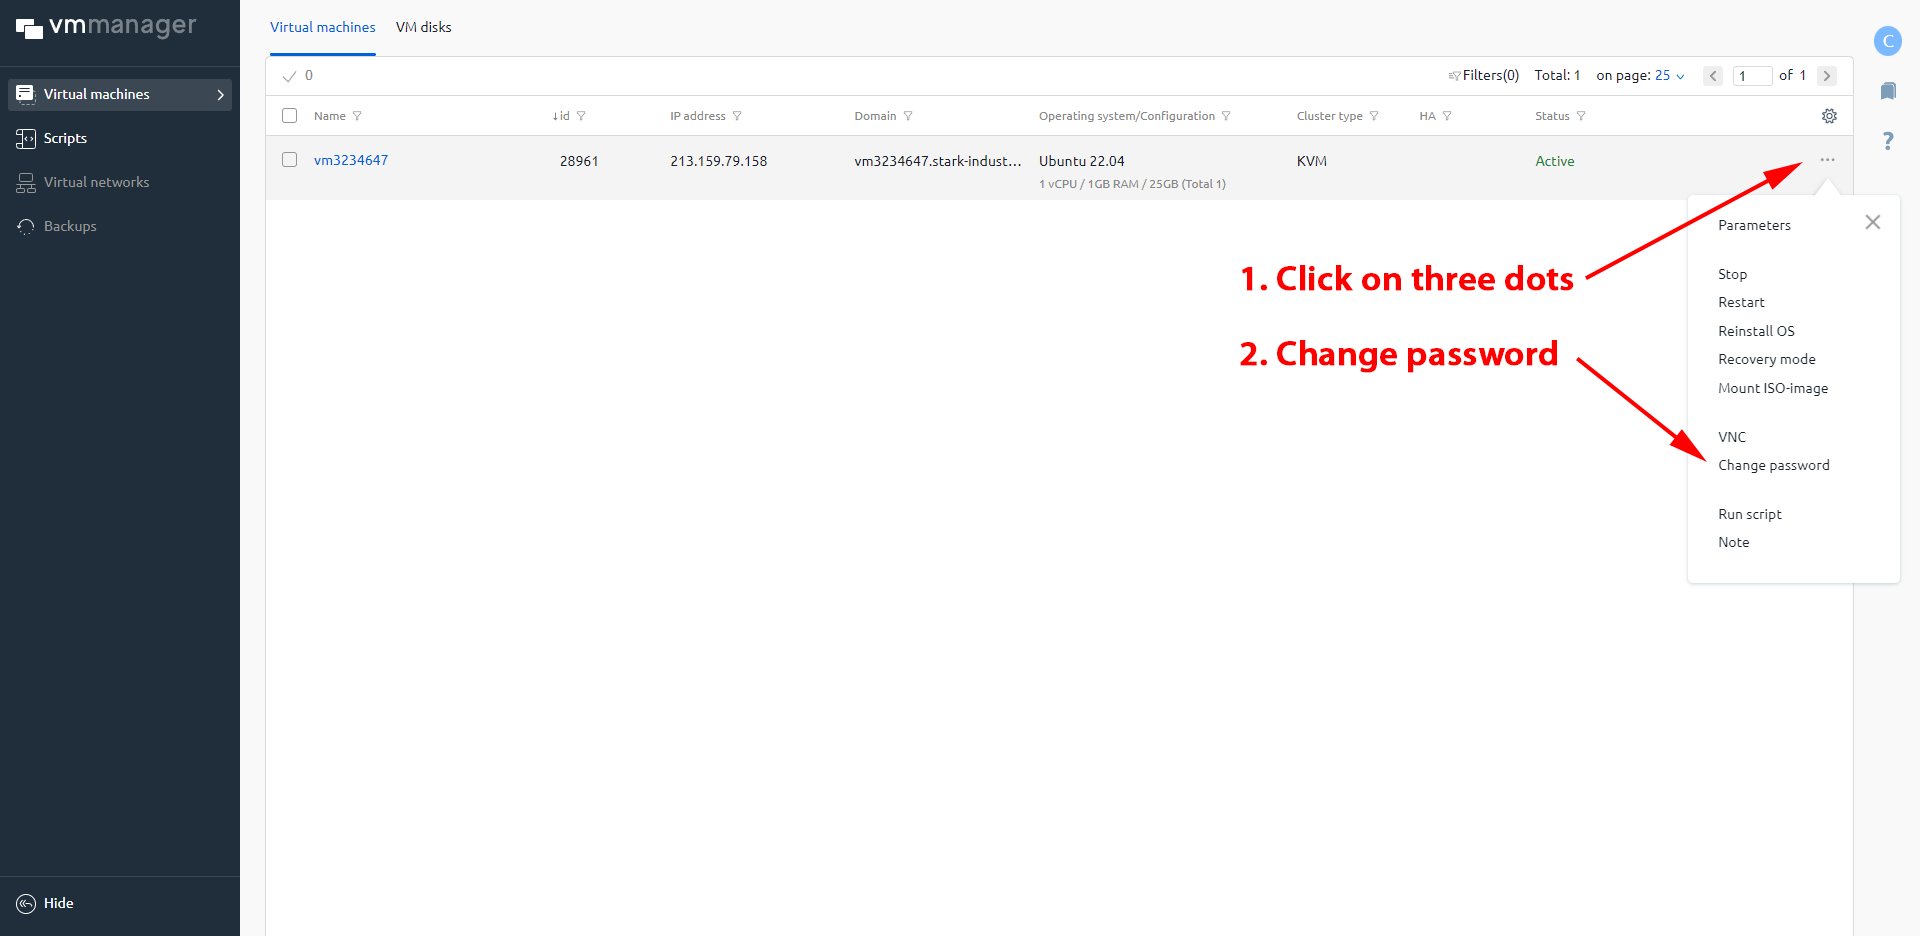
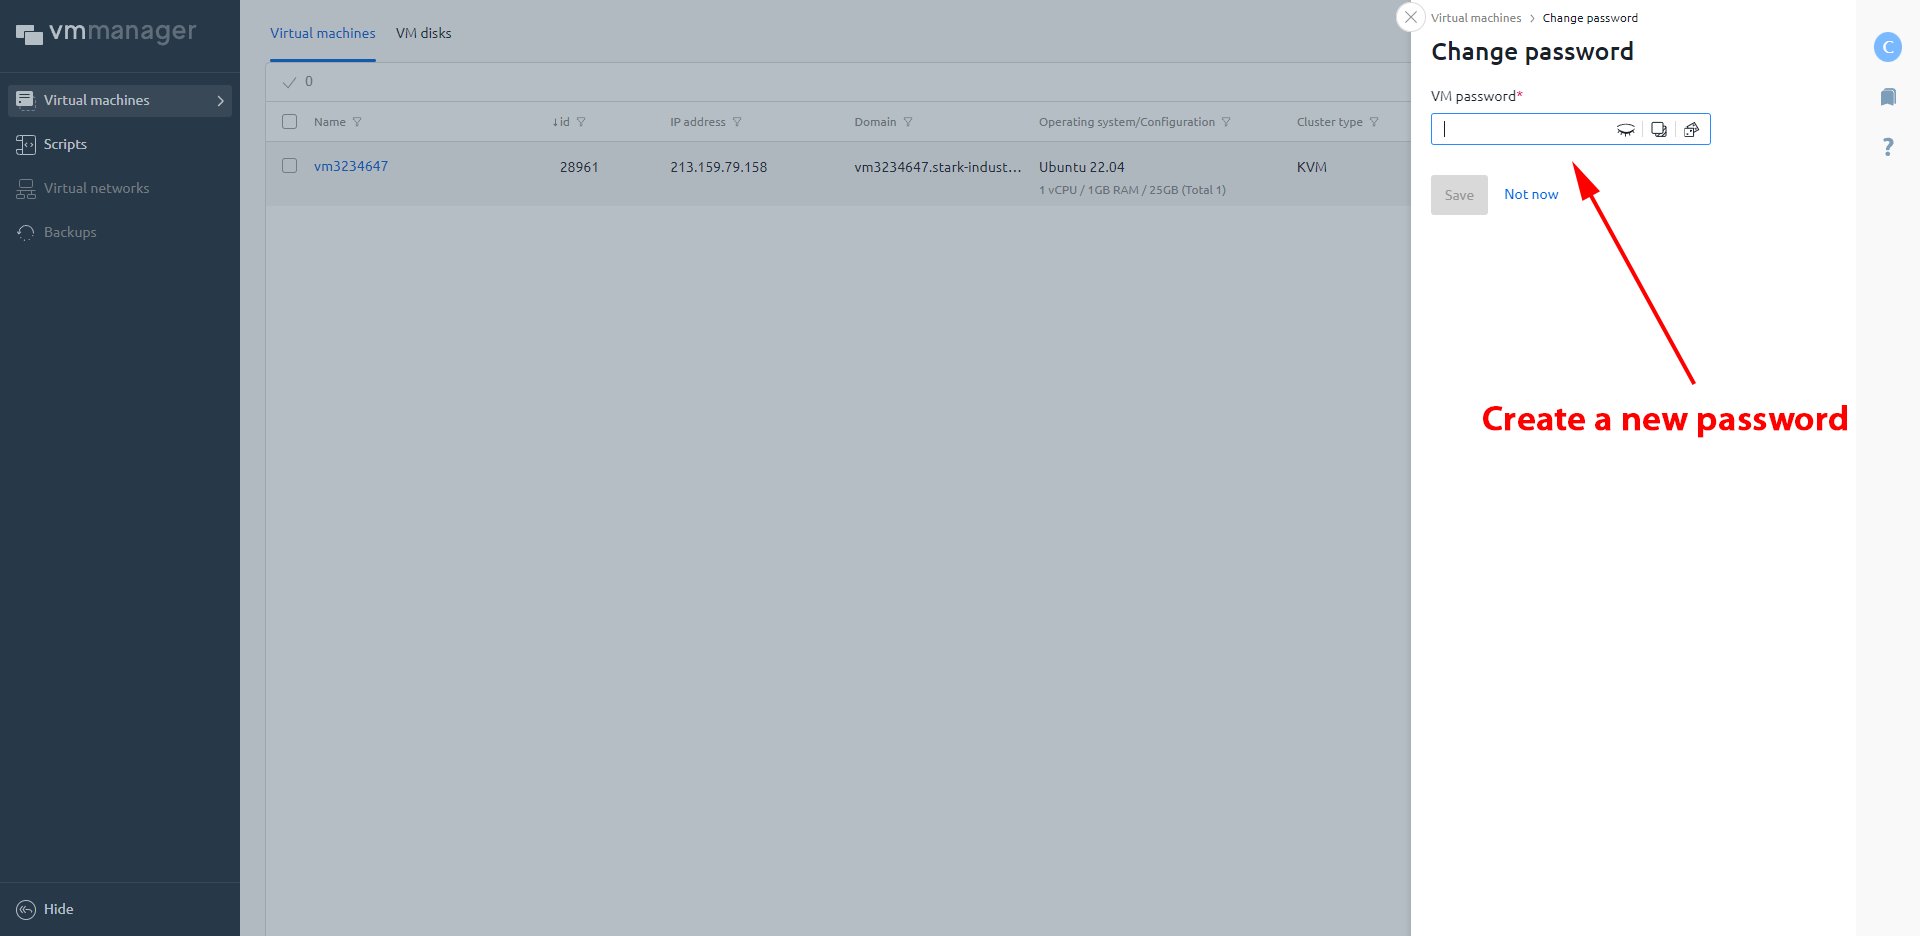
You've successfully set up the VPS. Now, let's proceed to the 'Secrets' task.
Complete “Secrets”:
Go to: https://verifier.nillion.com
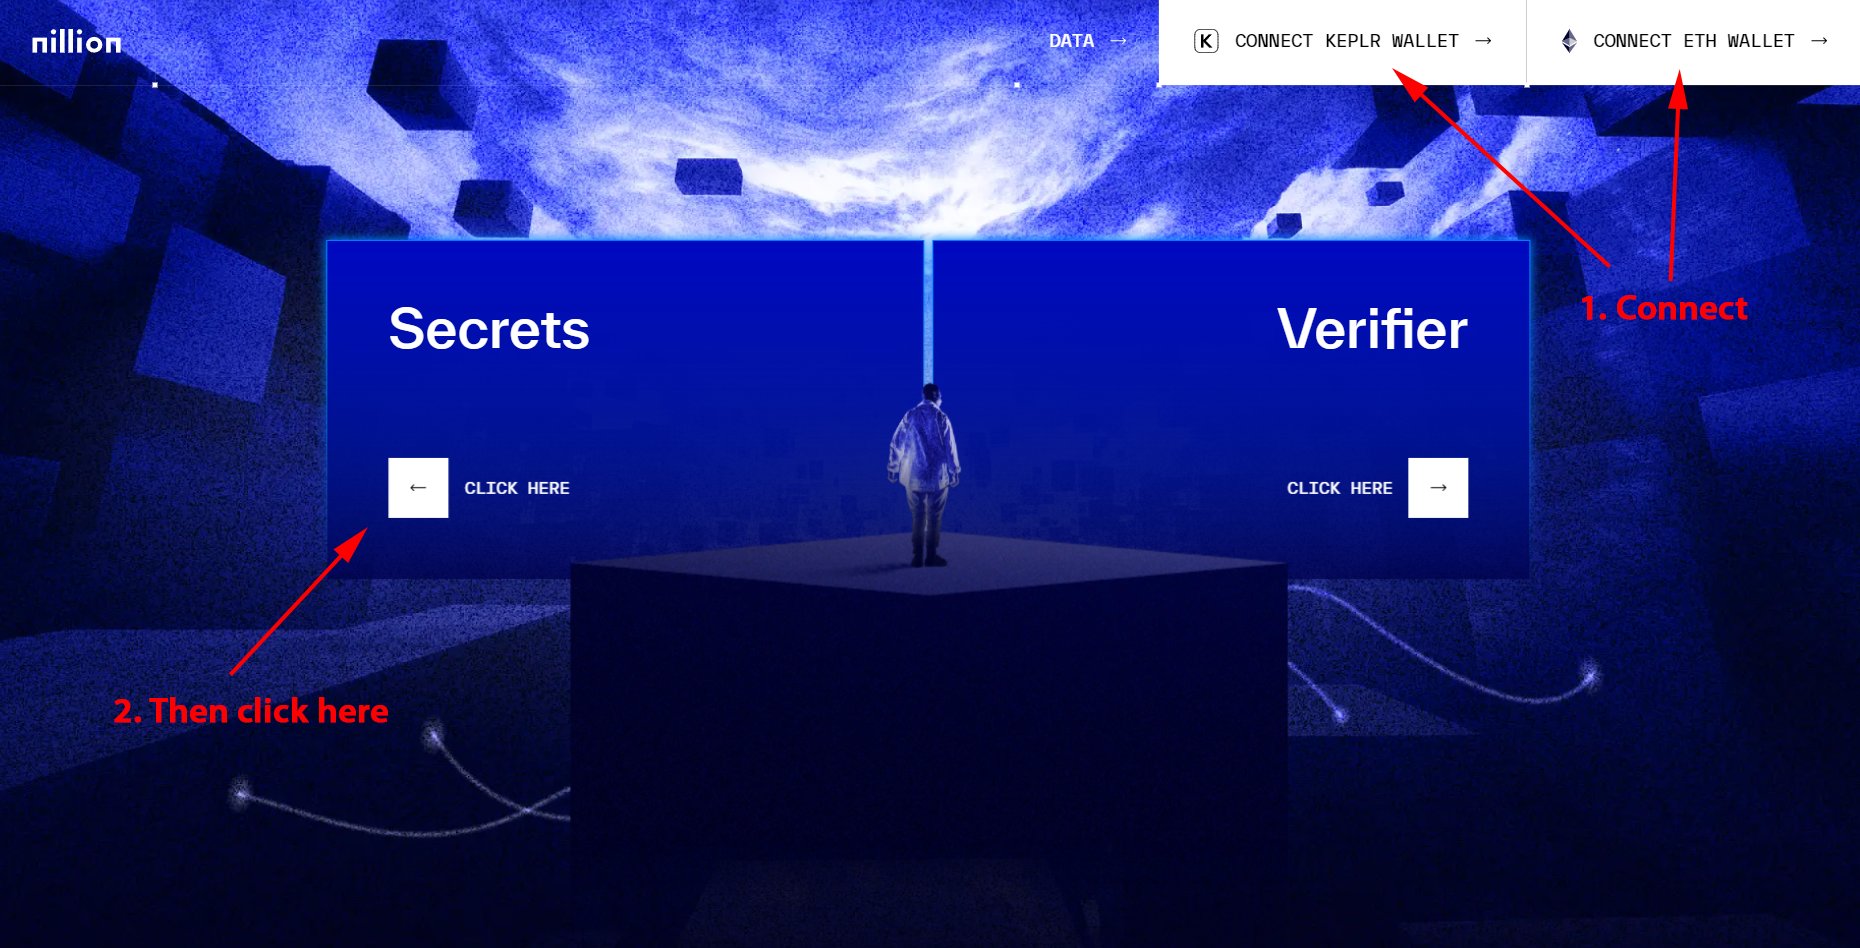
Connect your Kepler and EVM wallets (such as MetaMask), then click 'Secrets'.
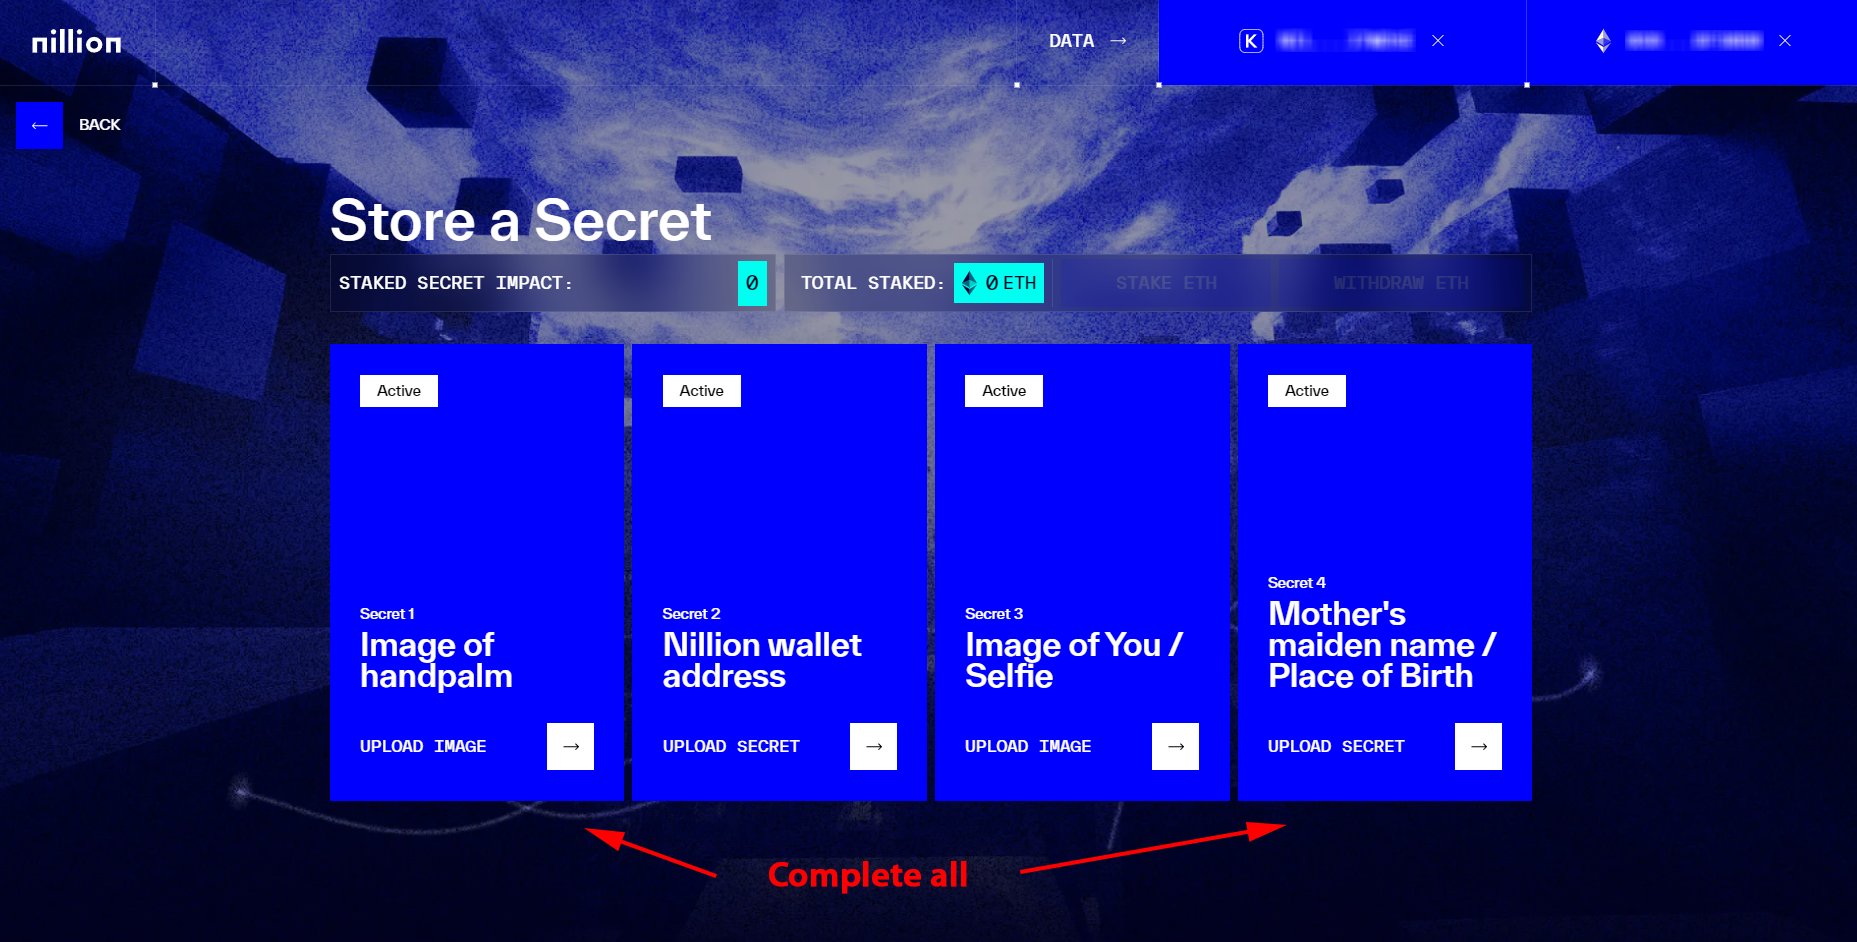
Next, complete all the tasks on this new page. These tasks involve uploading a photo of your palm, your Nillion wallet address, a selfie, and your mother’s maiden name or place of birth.
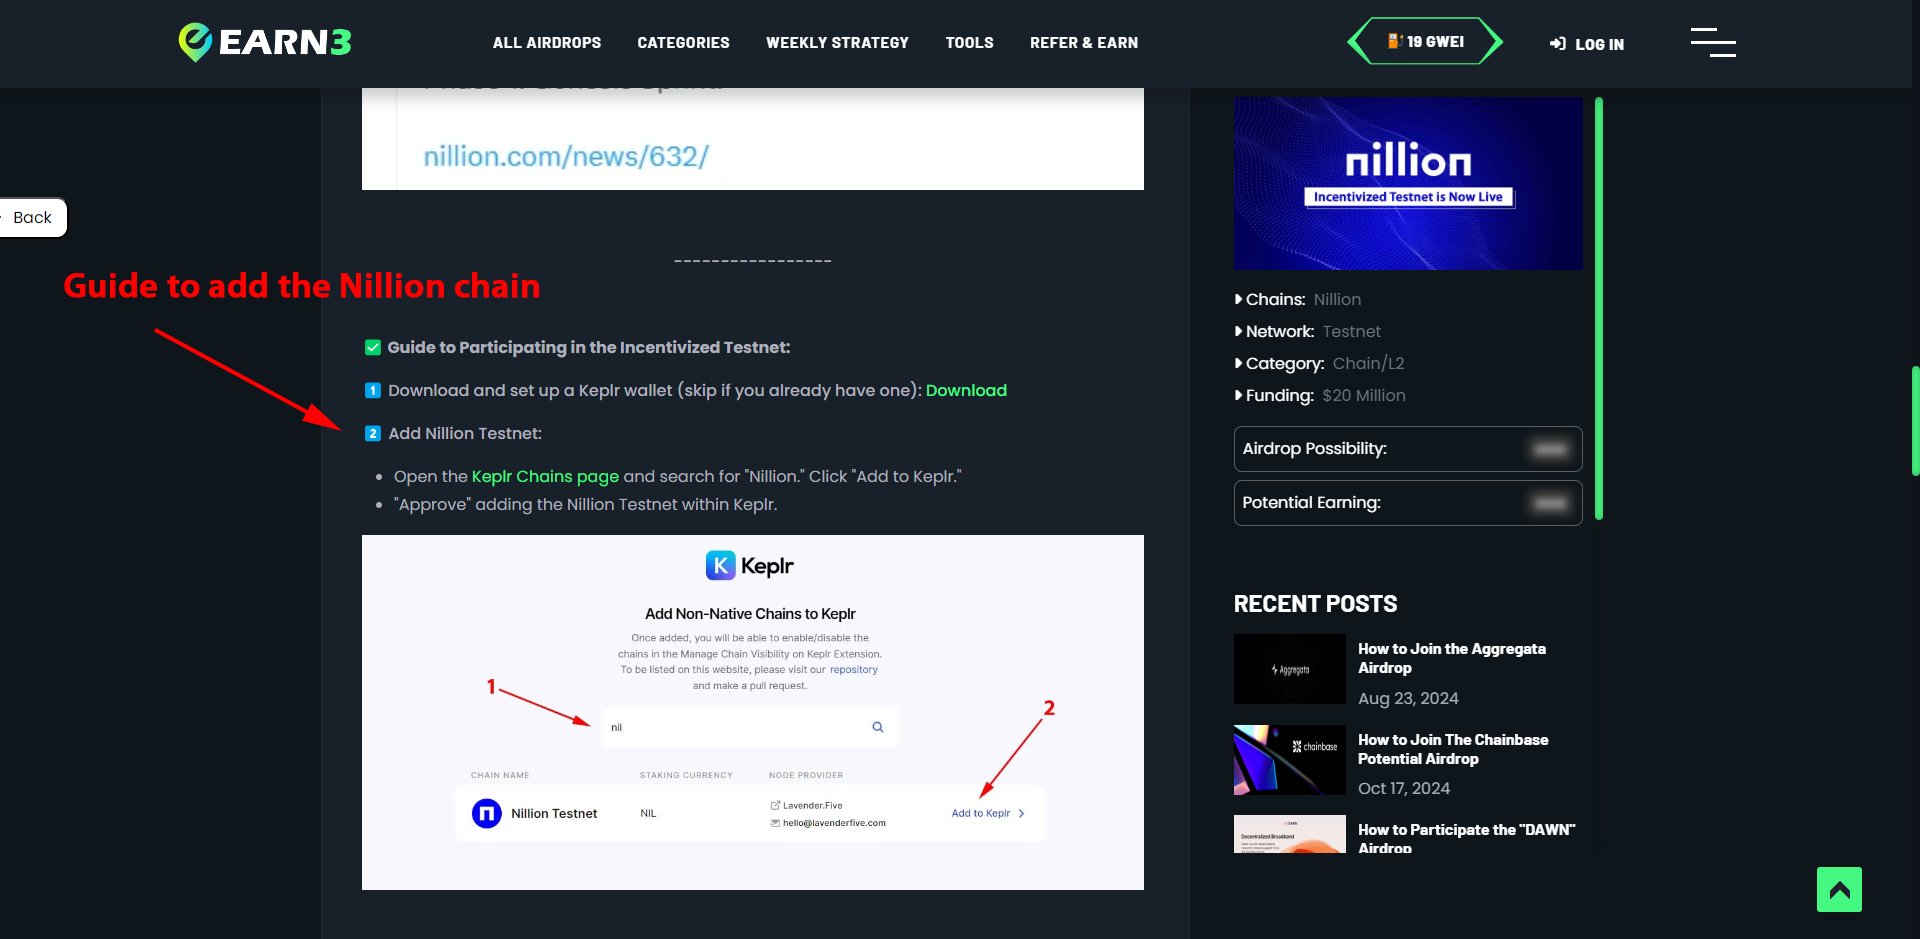
If you don’t have a Nillion address set up in your Keplr wallet, refer to this guide.
After completing the 'Secrets' task, return to the previous page and select 'Verifier'.
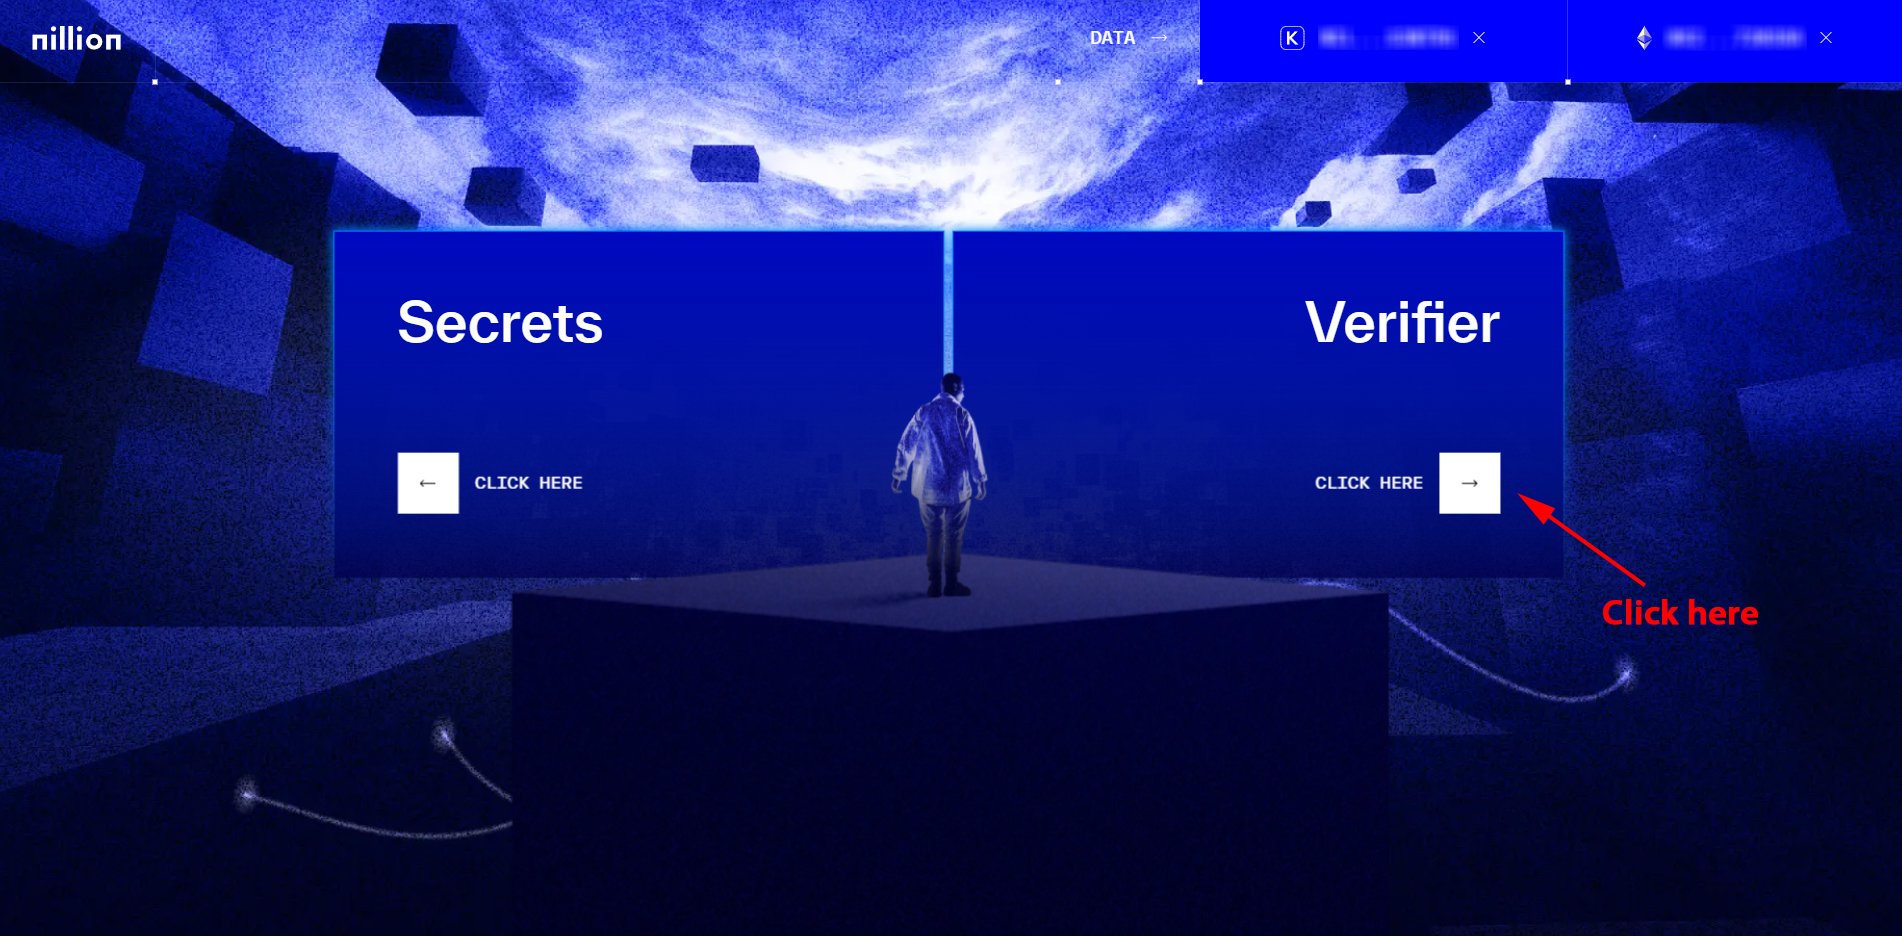
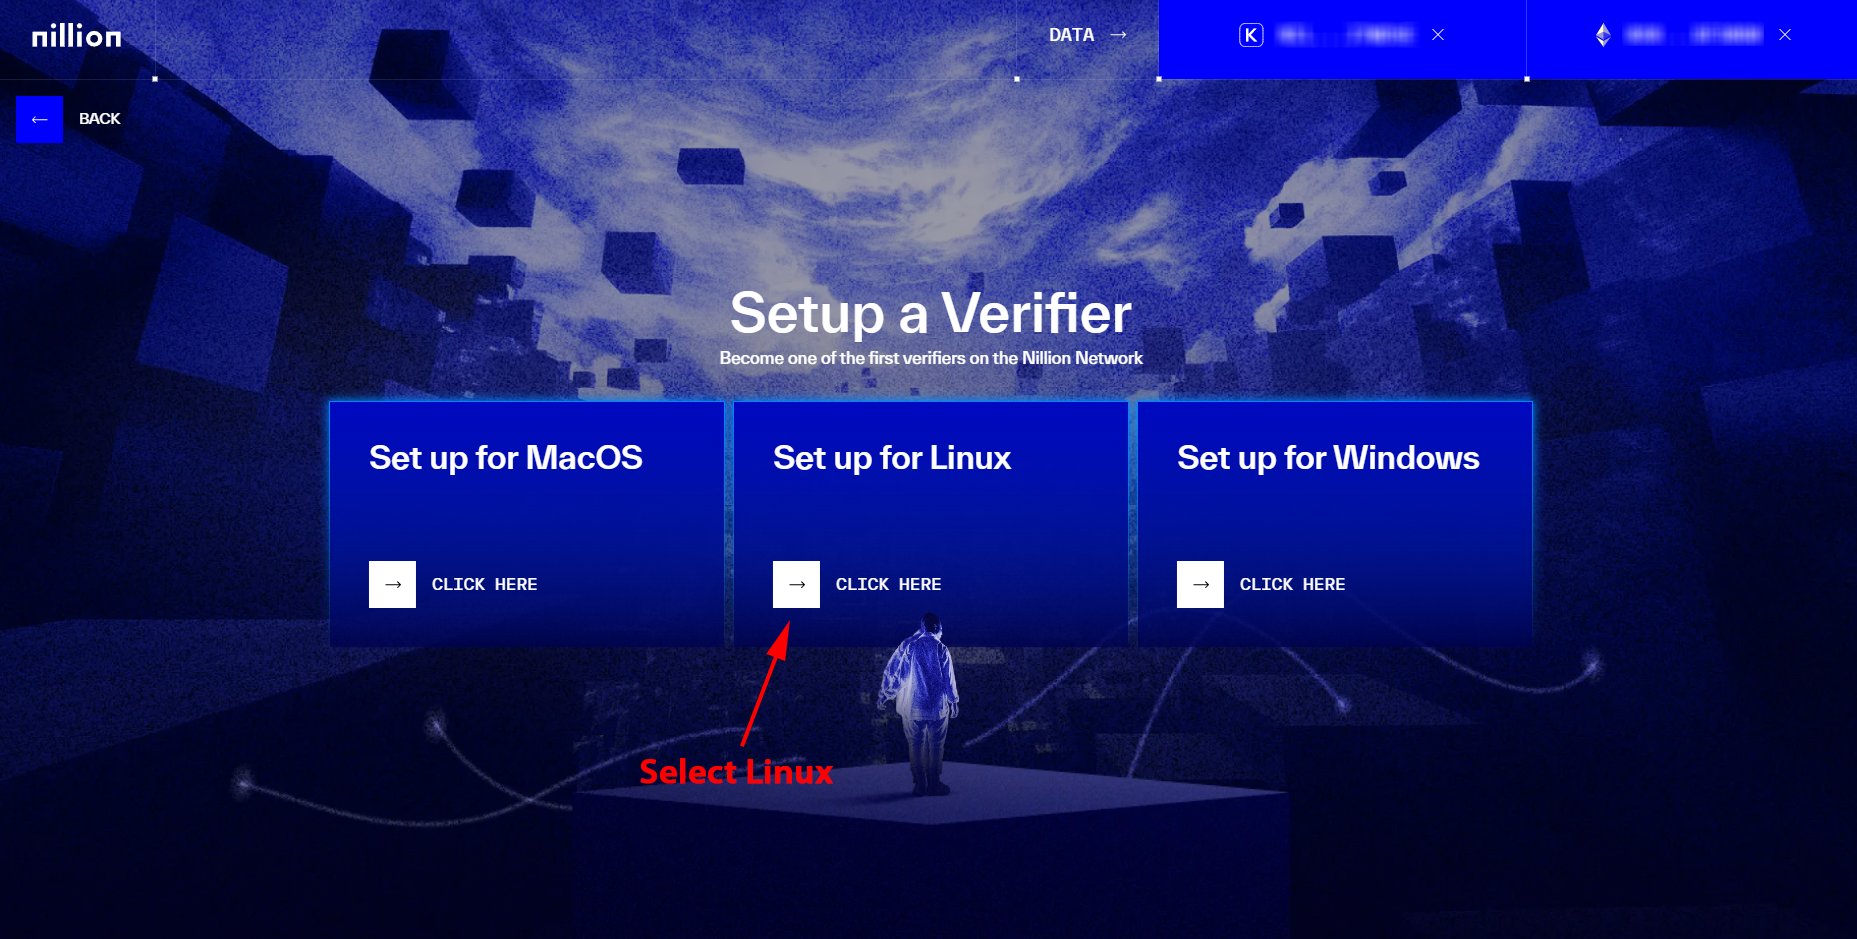
Be a Verifier:
Select “Linux” 👇🏻
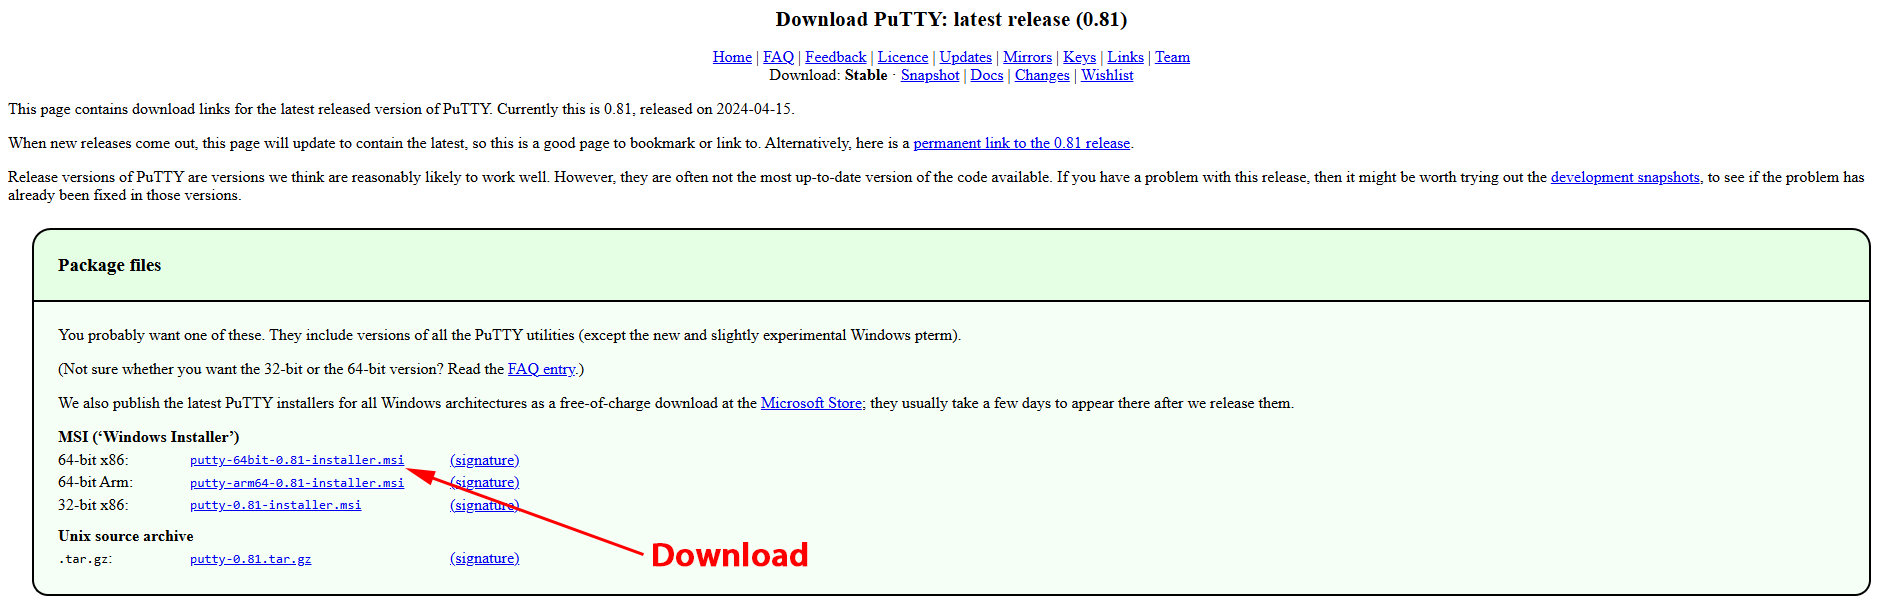
Now download and install the PuTTY software.
If you’re a Mac user, you can use Termius:
Free SSH Client for macOS
Modern SSH Client for macOS that will make you more productive. Termius will save you up to 30 mins a day.

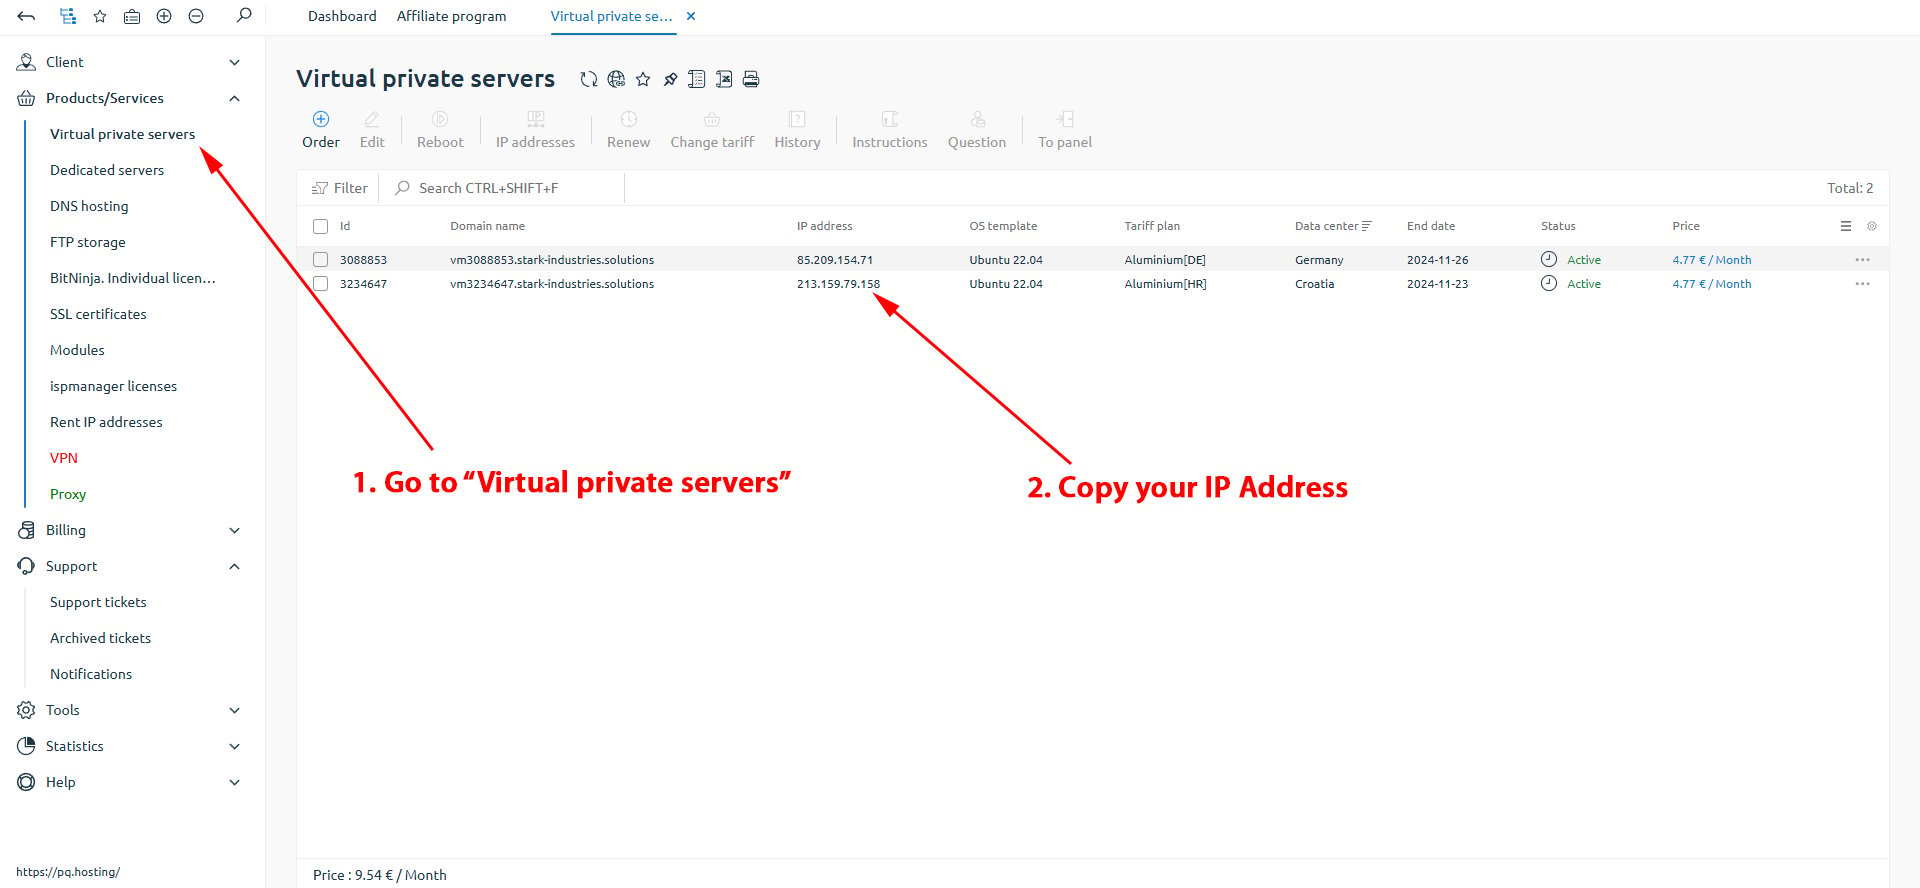
Open PuTTY or Termius and paste the IP Address of your VPS. You can find your IP address on the PQ hosting dashboard page.
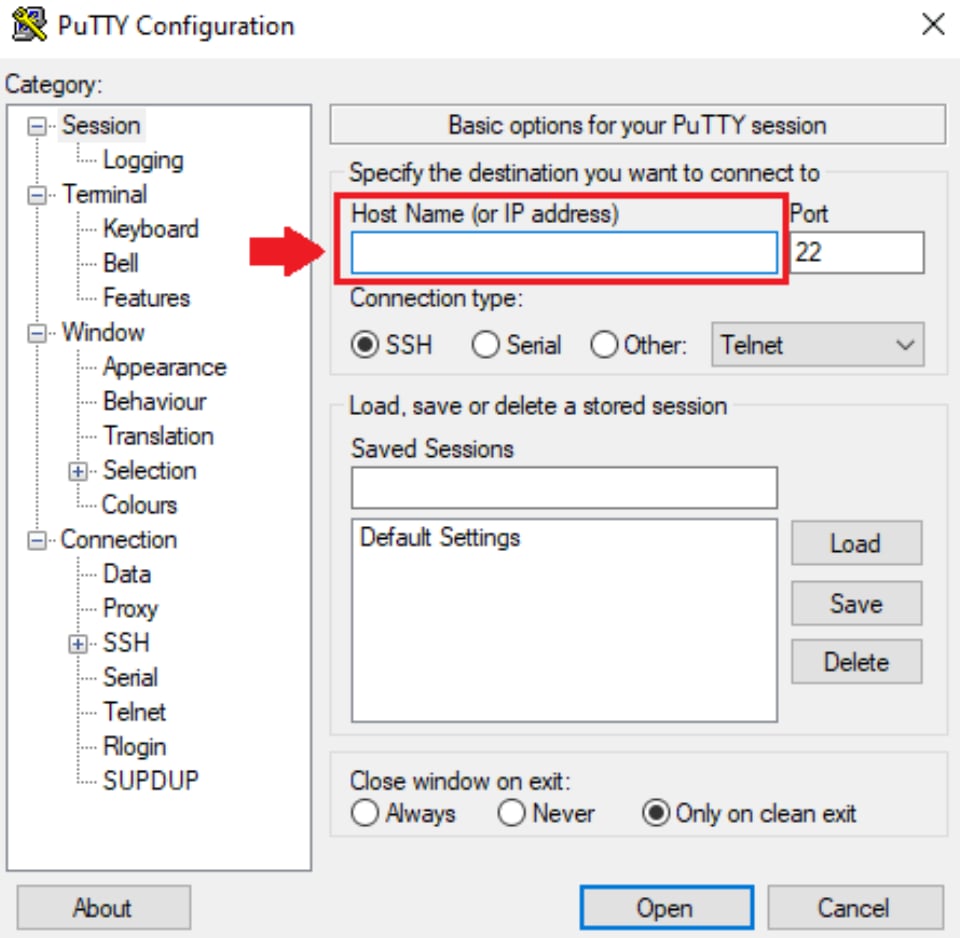
Then go to “Connection”.
In the field beside Seconds between keepalives, enter 5.
Check to Enable TCP Keepalives (SO_KEEPALIVE option) and click on “Open”.
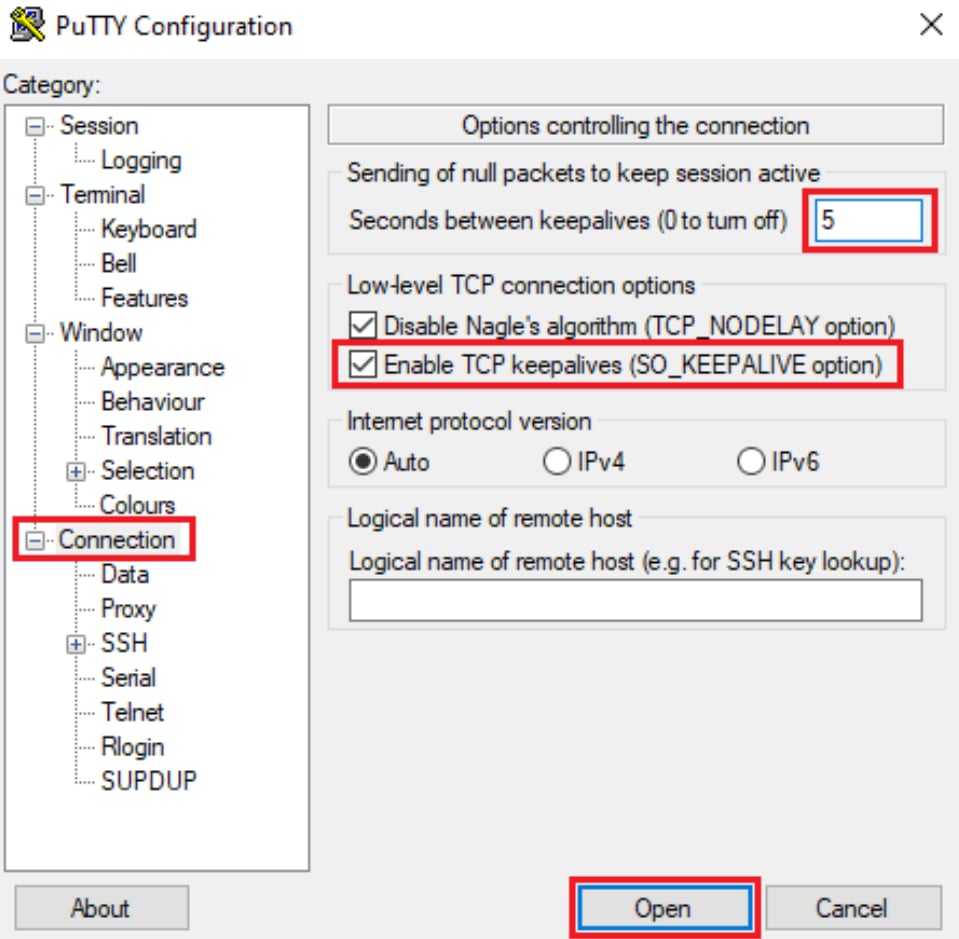
Now a new window will open
Here, login as “root”.
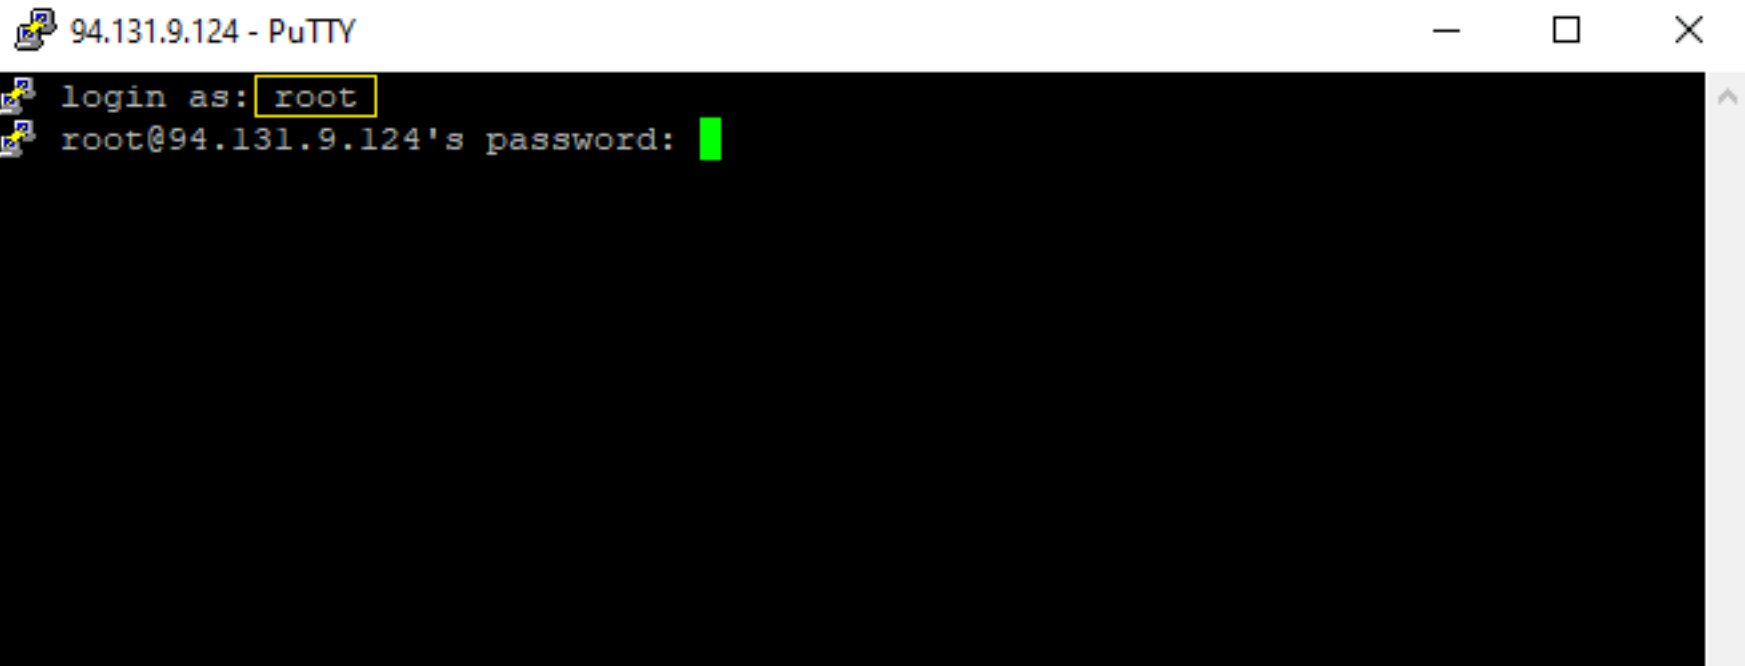
Paste the password (which you saved from your VPS details).
Keep in mind that you won't see the password as you type it. Just type it in and hit Enter.
Once you enter the password correctly, you will see a window like this 👇🏻
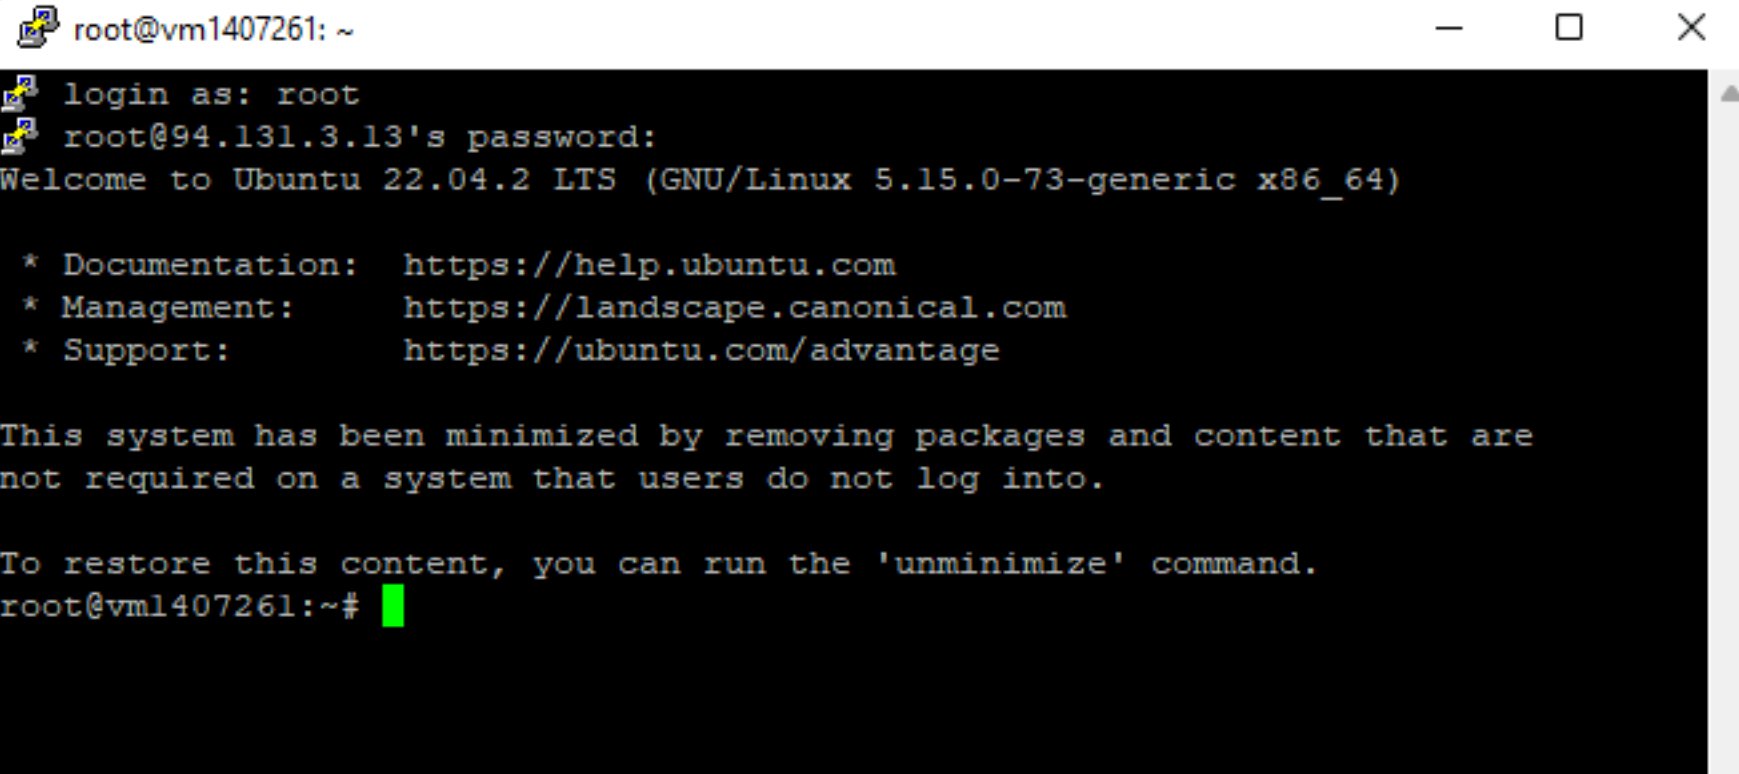
If you're setting up your VPS for the first time, it may not have Docker installed. To get the latest Docker version, run the following commands one by one.
👉🏻 To paste the commands into the PuTTY terminal, copy the code below, right-click in the terminal, and then press 'Enter' on your keyboard.
👉🏻 If prompted with a Y/N option, type “Y” and press Enter. Type “1” and press Enter if asked to choose a number.
sudo apt update
sudo apt install apt-transport-https ca-certificates curl software-properties-common
curl -fsSL https://download.docker.com/linux/ubuntu/gpg | sudo gpg --dearmor -o /usr/share/keyrings/docker-archive-keyring.gpg
echo "deb [arch=$(dpkg --print-architecture) signed-by=/usr/share/keyrings/docker-archive-keyring.gpg] https://download.docker.com/linux/ubuntu $(lsb_release -cs) stable" | sudo tee /etc/apt/sources.list.d/docker.list > /dev/null
sudo apt update
sudo apt install docker-ce docker-ce-cli containerd.io
sudo systemctl start docker sudo systemctl enable docker
Check that Docker is installed and up-to-date by running this command:
docker --version
You should see a version number that is the same as or higher than the one below.
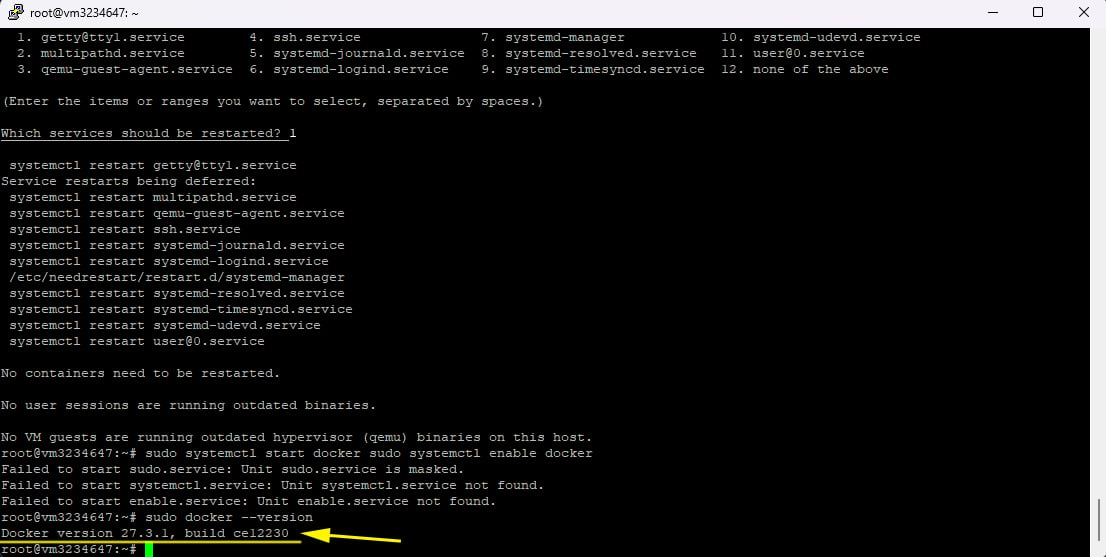
Now run this command:
docker pull nillion/verifier:v1.0.1
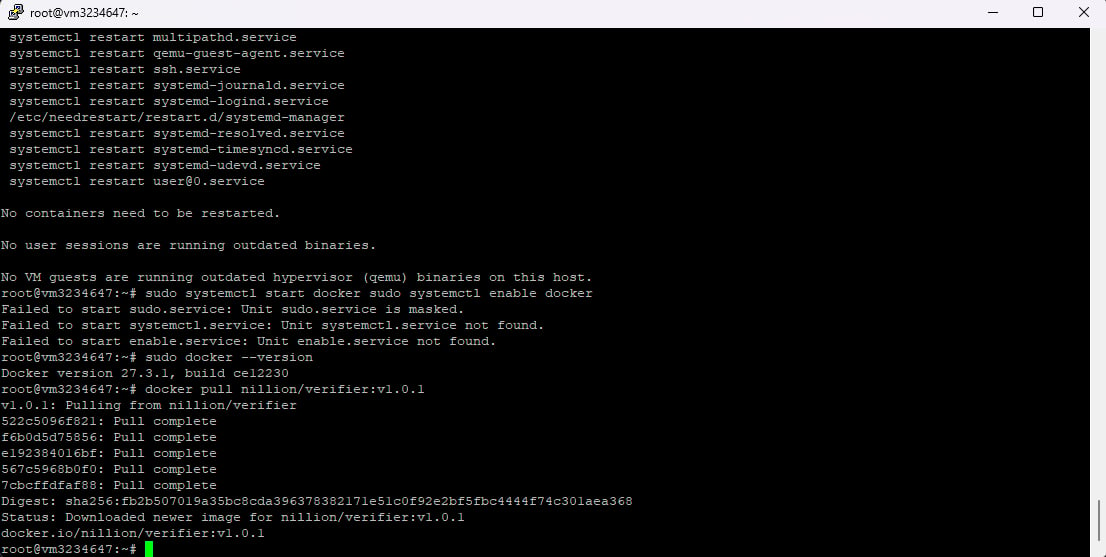
Then the following command:
mkdir -p nillion/verifier
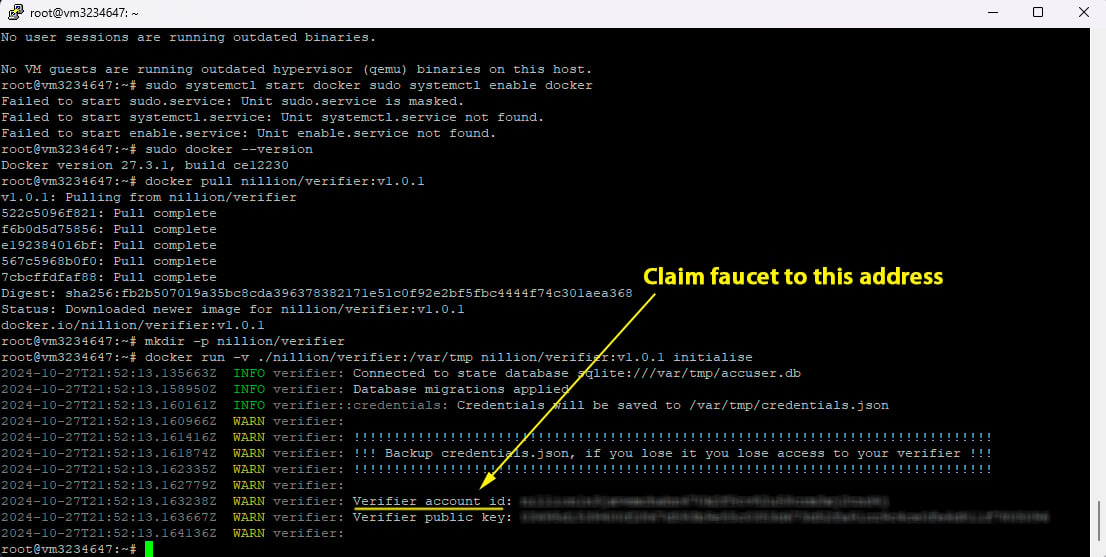
docker run -v ./nillion/verifier:/var/tmp nillion/verifier:v1.0.1 initialise
This will provide you with your verifier account ID and public key.
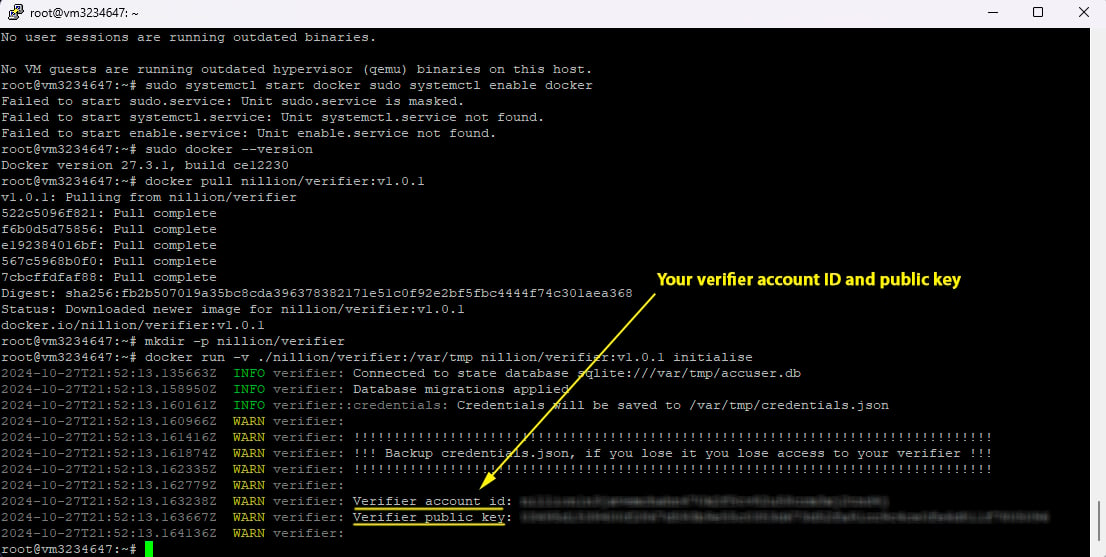
Copy and save it securely.
Go to the Nillion verifier page, paste your verifier account ID and public key, and complete the verifier connection.
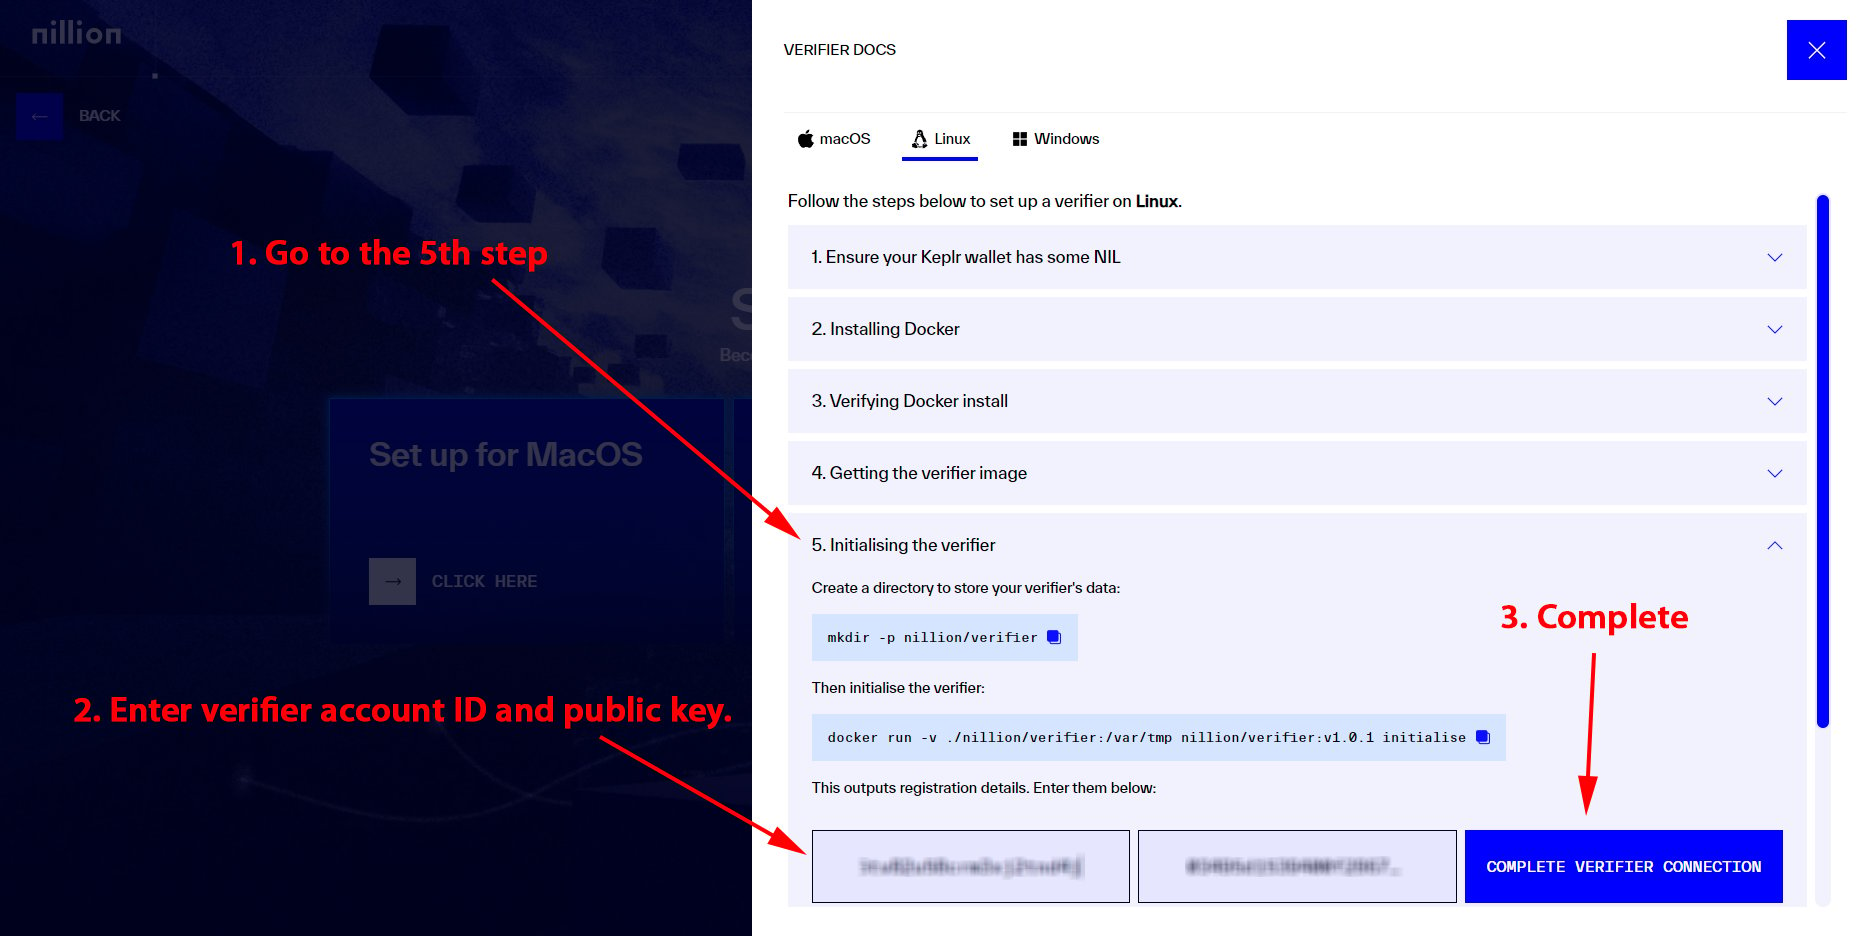
Approve the transaction in your Keplr wallet. If you don’t have faucet in your Keplr wallet on the Nillion chain, you can claim it here.
When it succeeds, a 'Verifier Registered' message will appear.
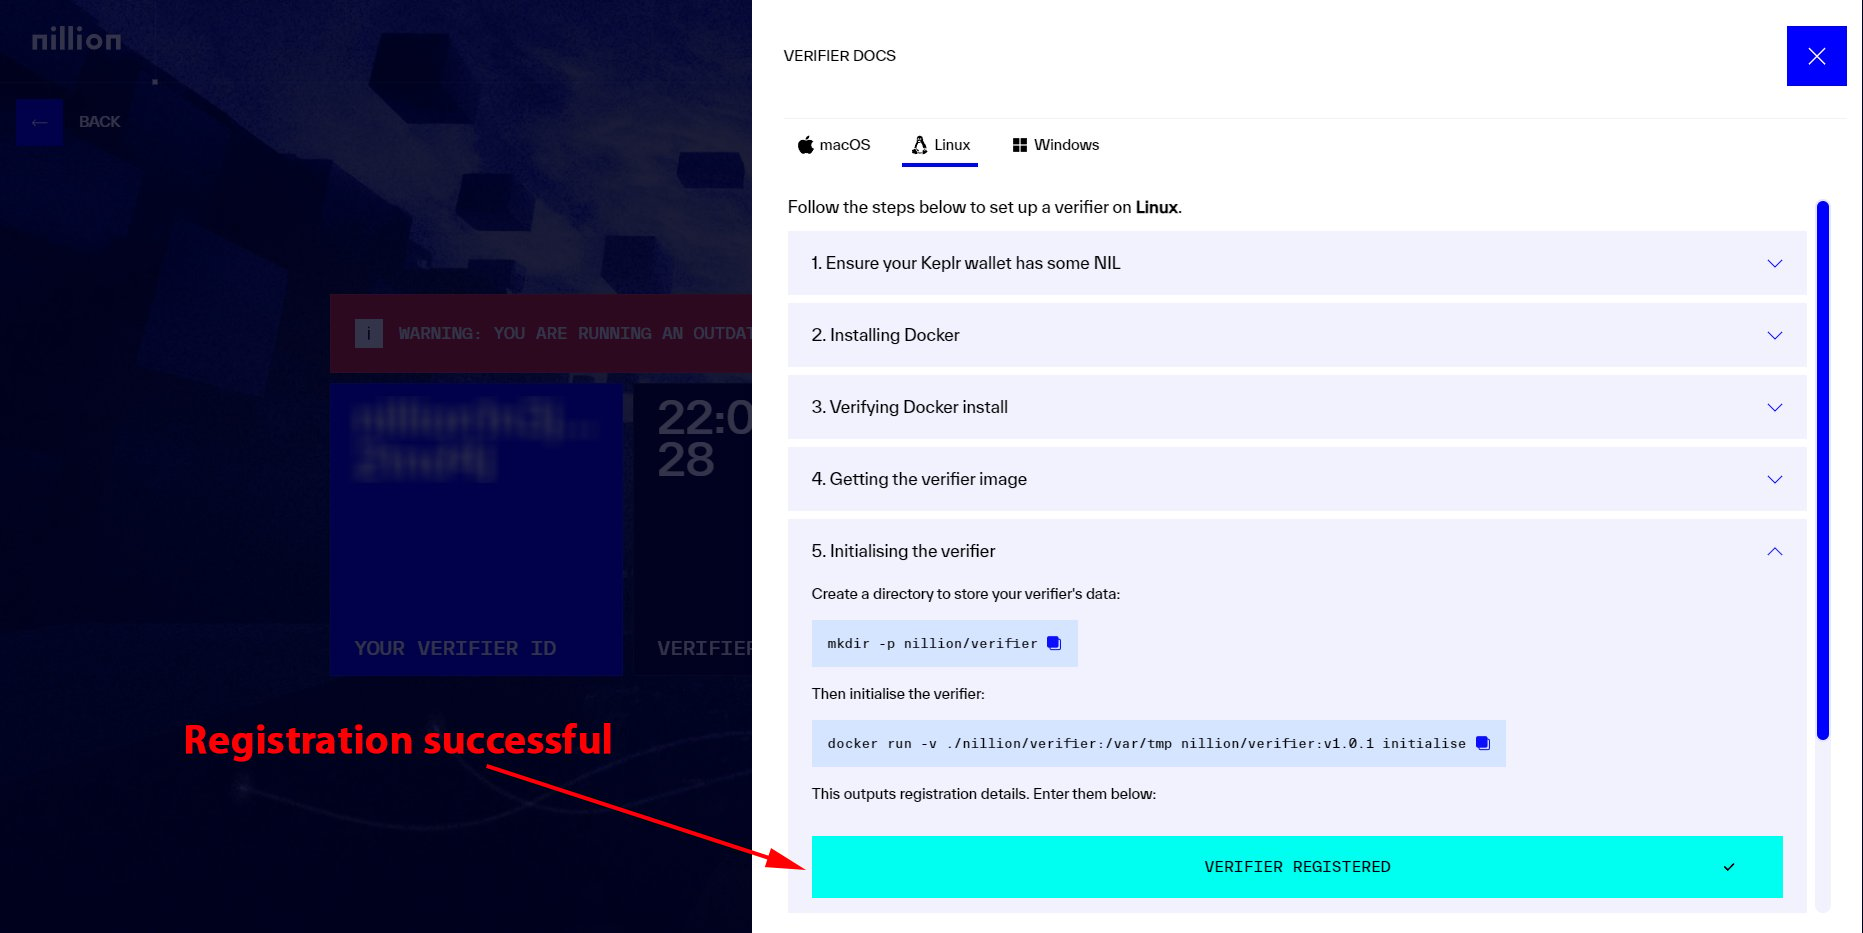
Now, go to the faucet page again: https://faucet.testnet.nillion.com
Claim the faucet to the Nillion wallet you recently saved.
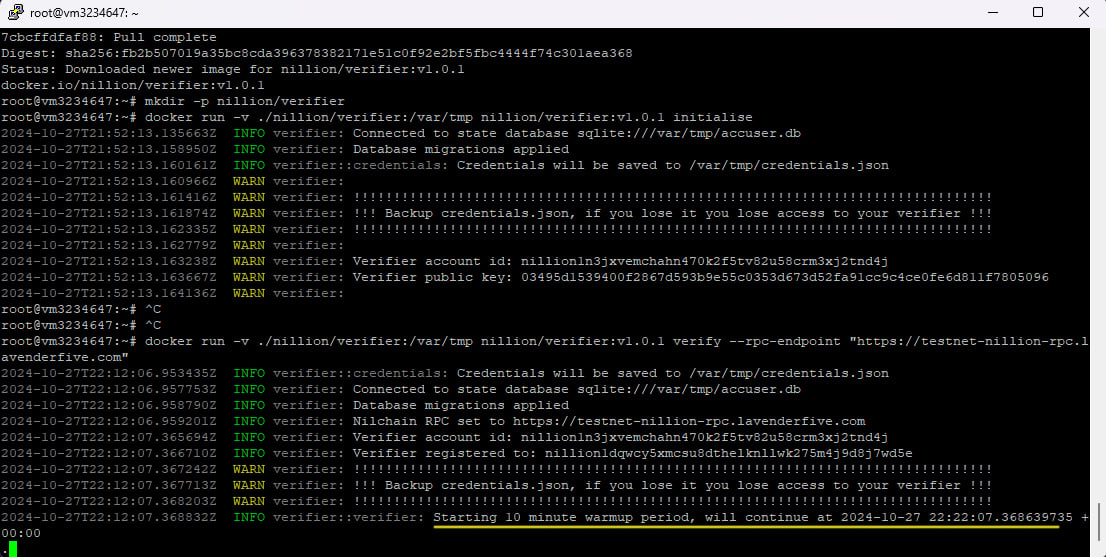
Finally, run the following command:
docker run -v ./nillion/verifier:/var/tmp nillion/verifier:v1.0.1 verify --rpc-endpoint "https://testnet-nillion-rpc.lavenderfive.com"
You should see a screen like this 👇🏻
Close the registration page.
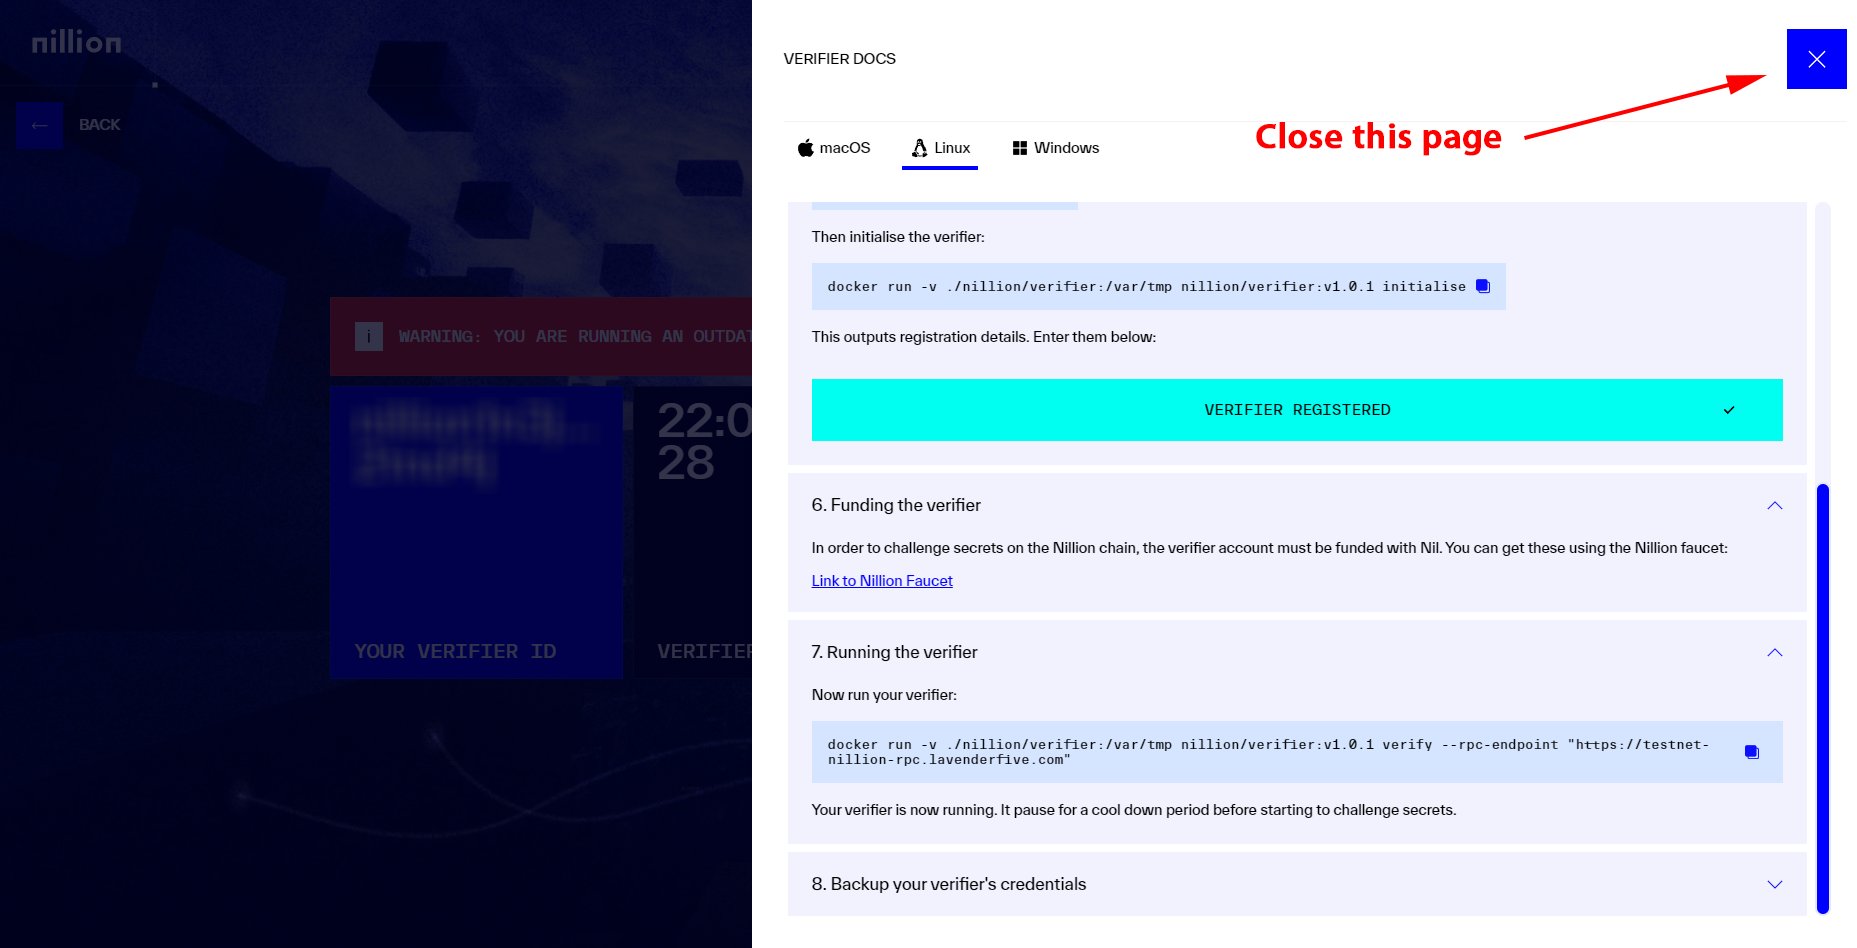
You should see a page like this 👇🏻
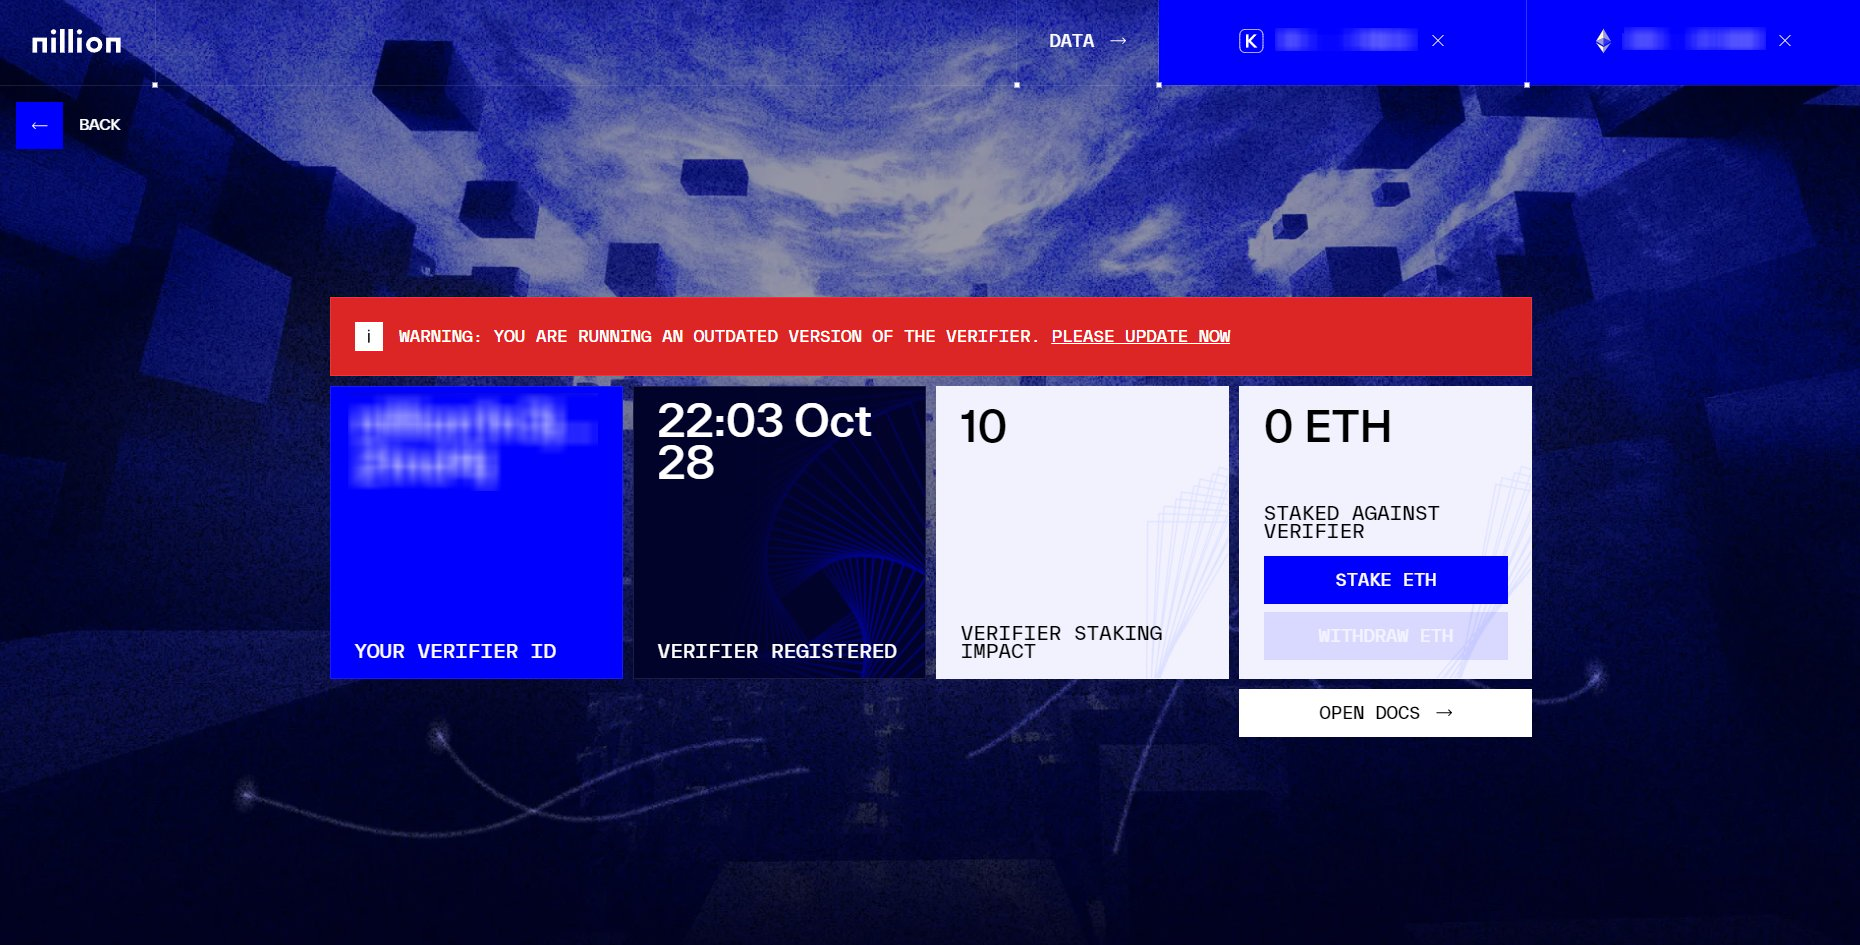
Wait for 10 to 12 minutes, then refresh the page. You should see a page like this.
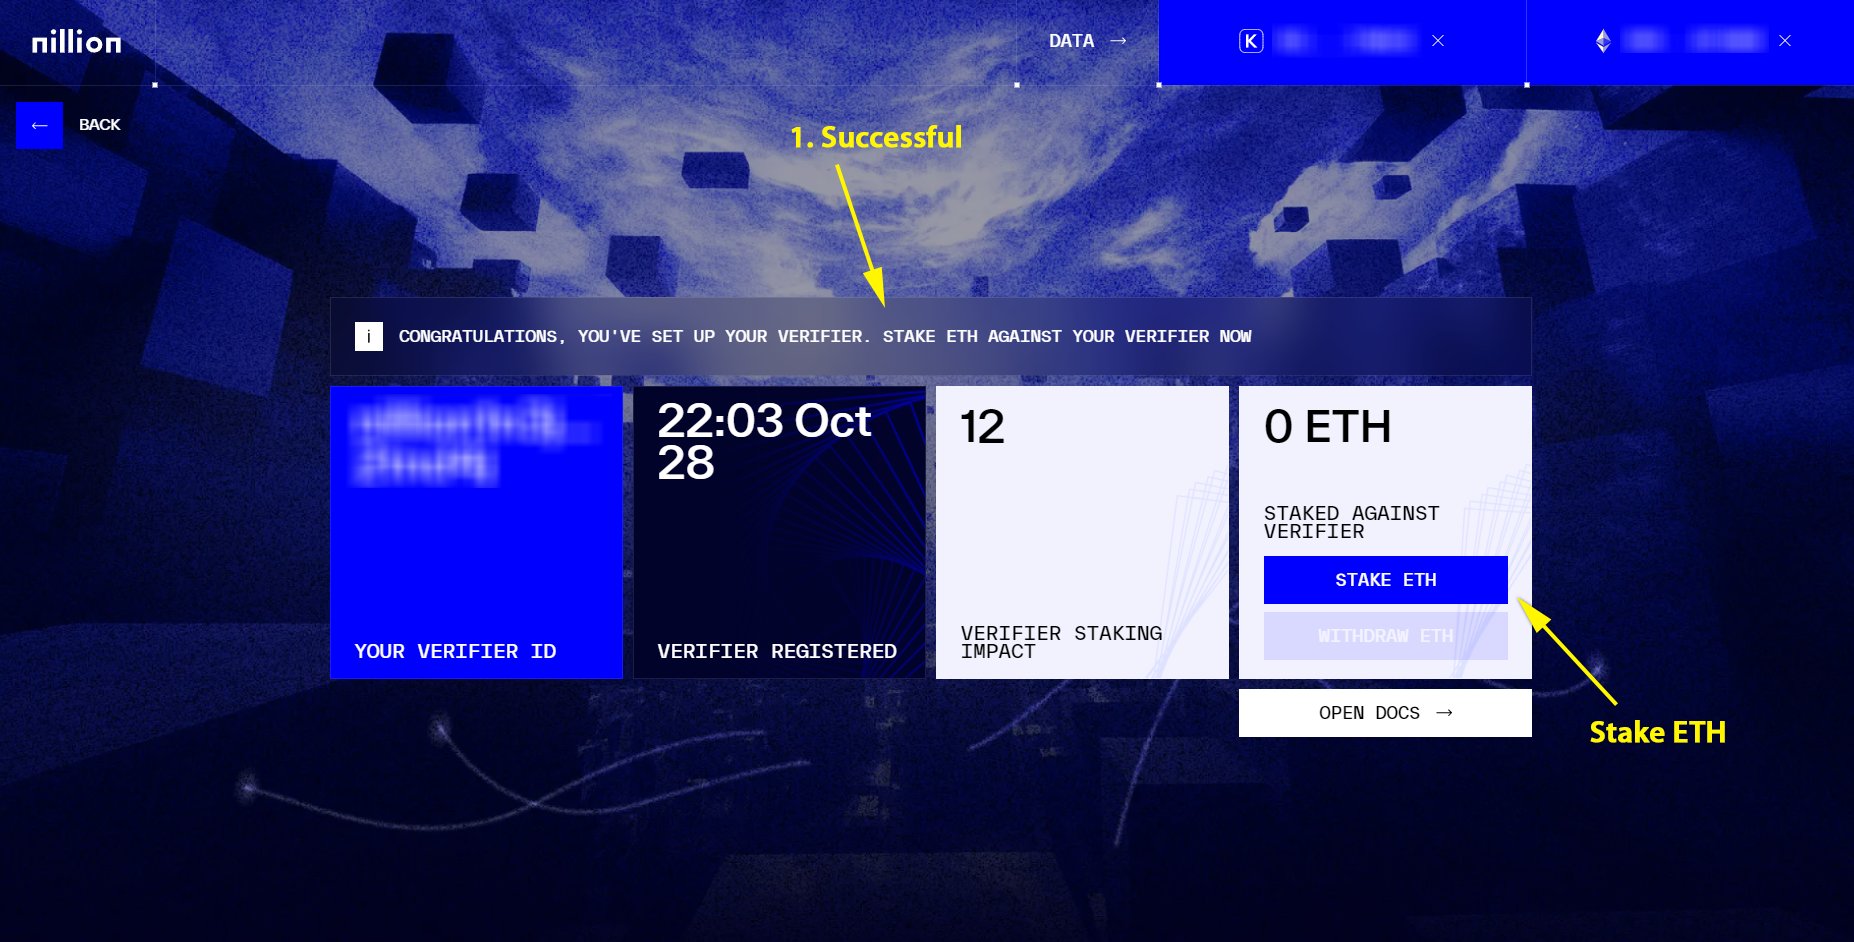
If everything looks good, close the PuTTY software.
Next, click on the 'Stake ETH' button.
Deposit your desired amount of ETH. Supports Ethereum mainnet only.
There’s no minimum requirement, but a larger amount is recommended for better results.
That's it! You've successfully completed the Verifier task.
Note: You can withdraw your ETH anytime, but be aware that this will lower your staking impact. It's best to keep your funds deposited until the verifier event is live or until the Nillion airdrop.