
A project catches your eye. But how do you get from that first spark of interest to a purchase? Signing in, adding funds and pressing the buy button involve several steps that need to make sense, especially when you are new to crypto.
This week, Files 026–030 followed that journey through EscapeHub. Ahead of the announced launchpad opening, this article brings those steps together.
FILE 026 · When and where does EscapeHub launch?
EscapeHub has announced its launchpad opening for 16 November 2026 at 15:00 UTC. Web and Android are scheduled for that date. According to the latest information available for this article, iOS is still awaiting Apple’s approval.
The launchpad is where projects can create their own tokens and users can trade them. This article describes the journey using official product information and supplied app screenshots ahead of launch.
Start at EscapeHub’s official website for its information and app links. The first practical question is which route is available on your device: the web version in your browser or the relevant mobile app.
FILE 027 · Your way into the app
Opening a crypto app for the first time should not mean having to work out which extra software to install first.
EscapeHub uses a built-in wallet to manage your funds and tokens. This route does not require a separate wallet app.
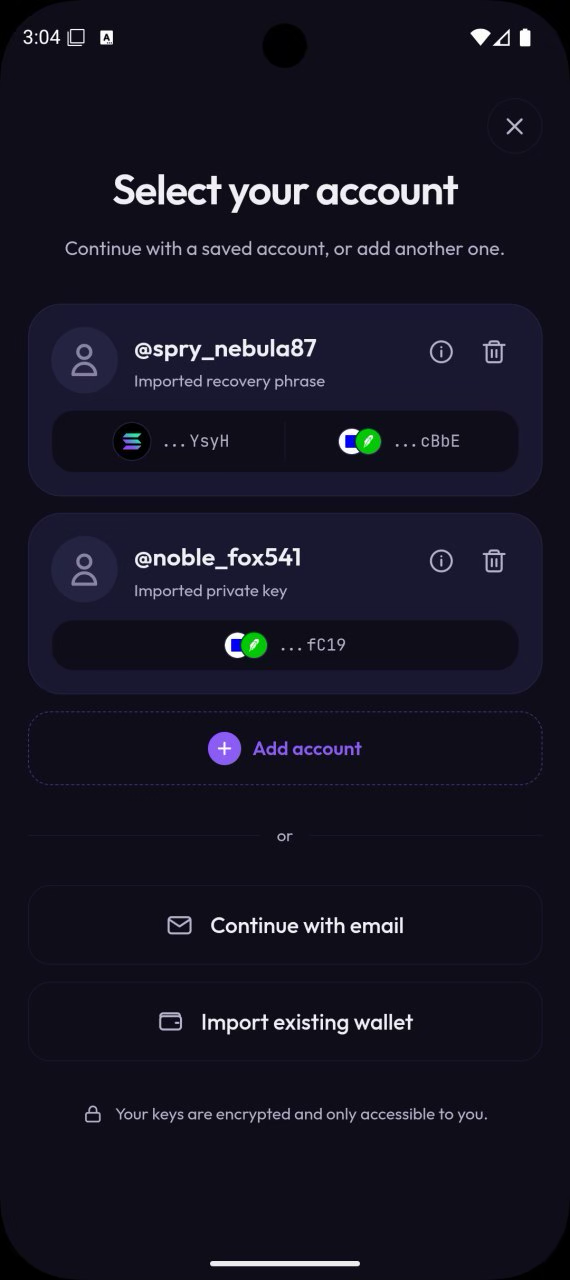
The newly supplied pre-launch screenshot shows saved accounts, email access and the option to import an existing wallet. New users do not need to import one. EscapeHub’s official website also lists Google and X as sign-in options; Apple appeared in an earlier beta screenshot.
The journey therefore begins with something familiar: choosing a sign-in method and accessing your account.
Signing in gives you access to the platform. It does not mean you already have funds or have bought anything. Those are separate steps.
Before adding funds, make sure you know which sign-in method you chose and how you will access your account again. Easy sign-in and recovering lost access are different questions. Follow the recovery instructions for your particular access method.
FILE 028 · Add funds with a familiar payment method
EscapeHub describes buying crypto funds within its mobile apps using Apple Pay, Google Pay, or a credit or debit card.
That makes the starting process easier to follow: choose a payment method, enter an amount and review the payment information.
Adding funds is not the same as buying a particular project’s token. It prepares your account for a later trade. You still decide which project interests you and how much to spend on it.
Apple sign-in and Apple Pay serve different purposes: one lets you access your account; the other pays for funds. The same distinction applies to Google sign-in and Google Pay.
Check what you will pay, which fees apply and what funds you will receive. The network—the system that records funds and trades—matters too: funds on one network are not automatically available on another. Check the available choices in the payment process and any further steps required.
FILE 029 · Discover projects and find them again
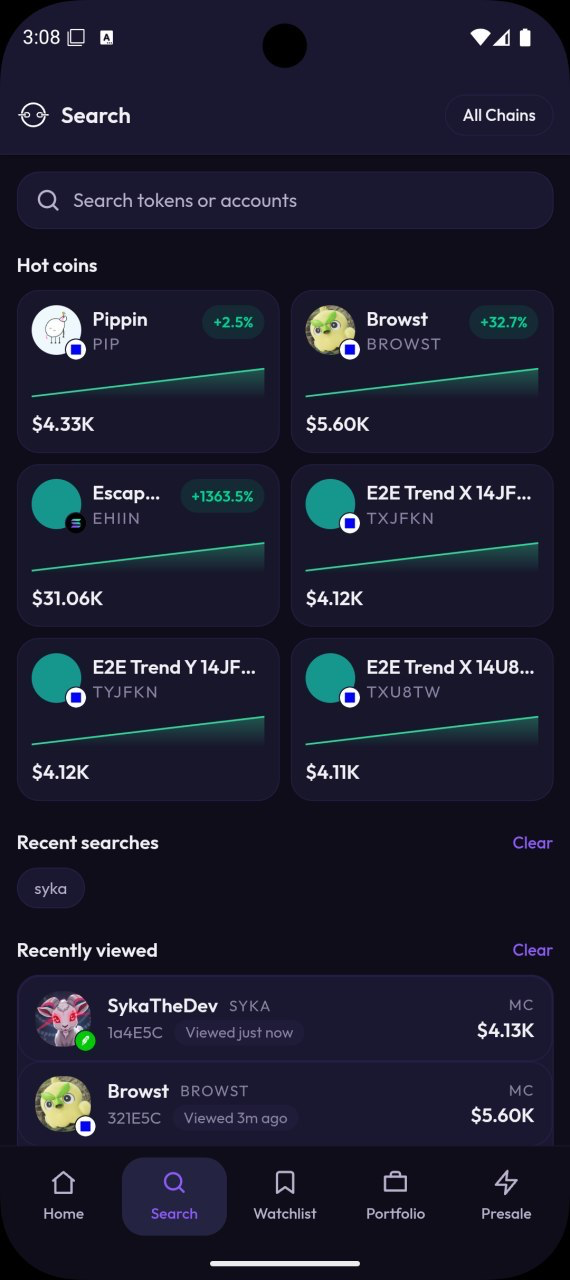
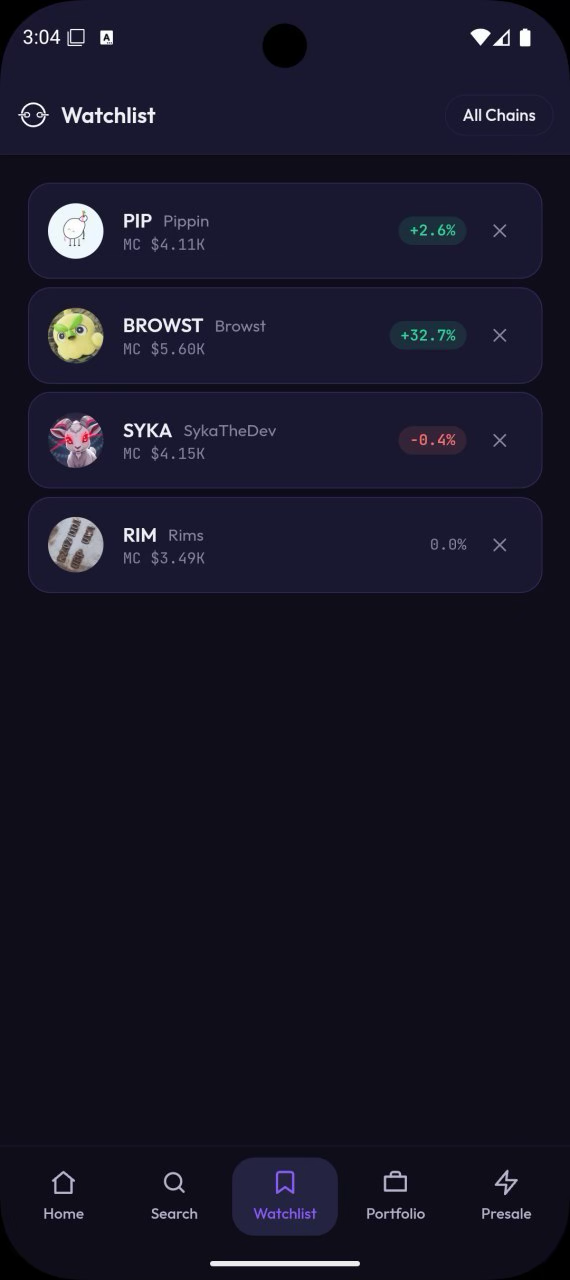
Once you have access, you can explore. The supplied search screen shows a field for tokens and accounts, an “All Chains” network selector, and recent searches and views. The watchlist has its own place in the bottom navigation.
These serve different purposes. An overview can introduce a project. Search helps you find it again. Project information gives you more to read about what it is doing. A watchlist keeps interesting projects available for a later visit.
That creates a useful sequence: discover, read and, if you want, save. An interesting project does not have to become an immediate purchase.
A price movement tells only part of the story. It does not explain what a project intends to do, which claims are supported or why you might care about it. The app can help you find and follow a project; forming your own view is another step.
Three questions help with a first look: Have I opened the right project? What can I learn about its purpose? Would I rather follow it for a while?
A name and short symbol alone may not uniquely identify a project. Check the stated network and compare the project link with the project’s own official information.
FILE 030 · Buy without extra wallet popups
Once you have made your decision, the feature that closed this week’s series comes into play.
EscapeHub calls it “signless trading”: buying and selling without a separate wallet confirmation window for each trade. Combined with the built-in wallet, it removes the repeated detour to another approval screen or password prompt.
The sequence becomes shorter: choose an amount, review the details and tap buy. Processing on the relevant network still takes place.
With fewer interruptions, reviewing the details before buying matters. The selected token, amount and costs should be clear before you submit the order.
There is another useful step after tapping: check the result. Submitting an order and completing a purchase are not the same thing. Look at the transaction response and then the corresponding holding. If the display is unclear, check the status before submitting the same order again.
How the steps fit together
Consider a simple fictional example. You discover a project, read about it and save it to your watchlist. Later, you decide to buy. You add funds, open the project again and choose your amount. After reviewing the details, you submit the purchase without an additional wallet confirmation window.
The described steps are brought together within the app. You decide when to move from watching to buying.
My perspective
What interests me is how sign-in, funding, discovery and trading come together. Getting started then involves less switching between different applications.
The watchlist leaves room to follow a project first. Trading without extra wallet popups makes the next step shorter. Together, these features create a way to get your bearings at your own pace.
Disclosure: I tested EscapeHub during its beta phase and participated in the presale. This article draws on the linked official product descriptions and supplied pre-launch app screenshots. The projects and figures shown illustrate the interface; they are not recommendations to buy. Not investment advice.